WPHRM Plugin Documentation
Introduction
Thank you for purchasing WPHRM WordPress plugin. Before you get started, please be sure to always check out this documentation carefully. We outline all kinds of important information, and provide you with all the details you need know to use WPHRM Plugin.
If you are unable to find your answer here in the documentation, please contact us on our Support desk.
What is included in the price?
- WPHRM WordPress Plugin
- Free Updates
- Plugin Documentation
- Premium Support - To our support desk.
Thanks!
Team Ommune
Features
Now it’s easy to manage your employees’ data and your company’s expense management within your WordPress admin panel.
Main Features of WPHRM
– Create multiple departments and multiple designations.– Easily manage your employees’ details. You can also attach specific documents to the employee’s profile.
– Employee salary management.
– Generate salary slips with custom fields.
– Easily add holidays in bulk.
– Apply, manage anad approve leaves in one place. You can also apply for halfday leave.
– Get notifications for events like salary generation, leave approval etc.
– WPHRM offers e-Notice Board with push notifications.
– Expense management with reporting which enables quick analysis of your monthly profits/losses.
Plugin Installation via WordPress
After the purchase you will be able to download the plugin .zip file.
When done, you should see wphrm.zip (zip file name can be changed from version to version)..
Please, follow the steps below to install WPHRM Plugin.
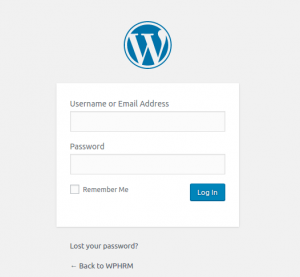
Step 1 - Login to your WordPress Dashboard.
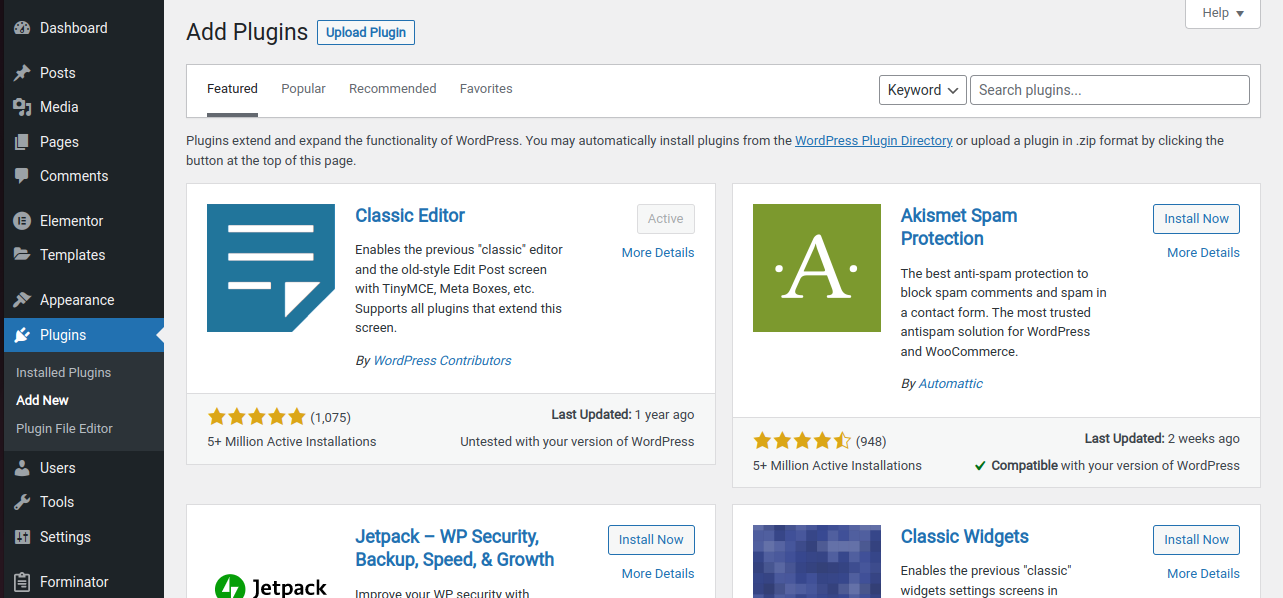
Step 2 - Go to Plugins > Add New button.( see screenshots below ).
Step 4 - Choose wphrm.zip.
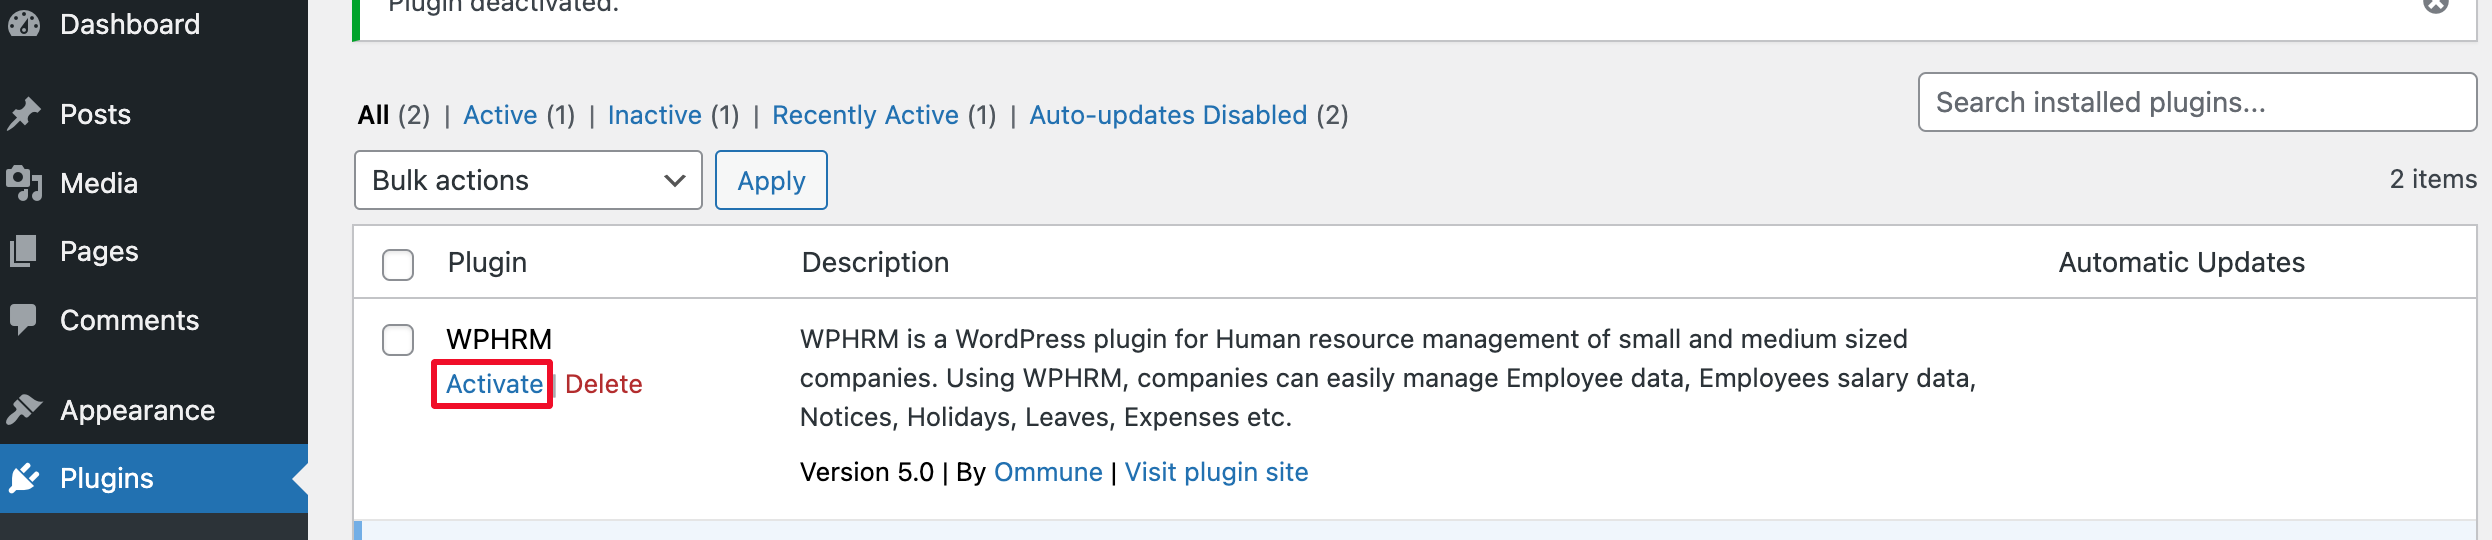
Step 5 - Wait while the plugin is uploaded and installed , when done Activate the WPHRM Plugin. (see screenshots below )
Step 6 - Congratulations ! You are ready to use WPHRM, but first Activate your license key.
Plugin Installation via FTP
If you are going to install the theme using FTP, you will need an FTP Client, such as FileZilla.
After the purchase you will be able to download the plugin.zip file.
When done, you should see wphrm.zip (folder name can be changed from version to version).
Please, follow the steps below to install WPHRM Plugin via FTP:
Step 1 - Log into your hosting space (server) via FTP client.
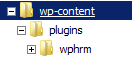
Step 2 - In extracted archive folder, find wphrm folder
Step 3 - Upload the wphrm folder to your server in path .…/wp-content/plugins/
Step 4 - The uploaded path should be like this: .../wp-content/plugins/wphrm//
Step 6 - Congratulation you are ready to use WPHRM, but first Activate your license key.
Additional Links
License Activation
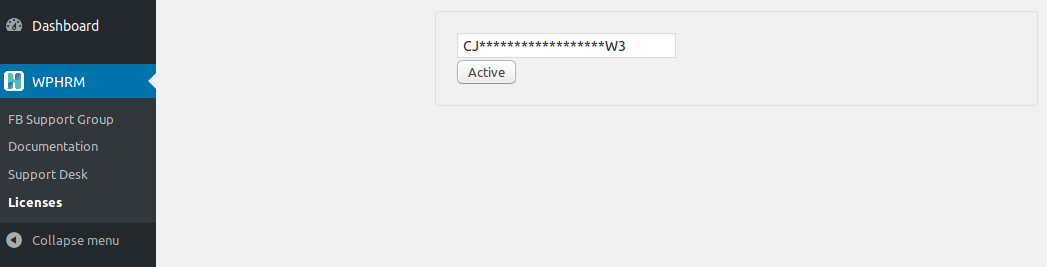
After installing the plugin the first step would be activating the license. Enter the license key and you’ll get an access.
Follow the below instruction to activate the plugin license.
Note: All the other menu items will only be visible, once the plugin license is successfully activated.
Go to your WordPress Dashboard > Appearance > WPHRM > License.Enter your license key and click on Active button. Now, your license key is activated and you can install the WPHRM Frontend addon plugin. Follow the same steps that you have followed earlier to install the WPHRM plugin.
Login Access
- If you have installed WPHRM Frontend Login Addon Plugin then just add wphrm at the end of your website URL.
E.g. www.yourwebsitename.com/wphrm
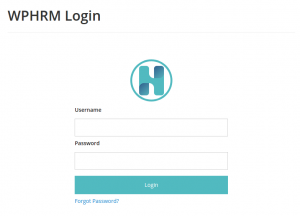
– Once you have installed this addon a new page by the name of WPHRM Login. Makes sure you do not delete this page. If deleted mistakenly then, Deactivate the WPHRM Frontend addon plugin and Activate it again. Now, you’ll see the page must be recreated.
Dashboard
After log in Employees can view their various offical records using the dashboard.
Step 1 - Login to your WordPress Dashboard.
Step 2 - Go to WPHRM > Dashboard. The Dashboard displays multiple notifications which help in handling your daily activities. Any new notices that will be forecasted will be visible in the Notice Board panel and by clicking on it you will get more details of it. In the Birthdays panel, today’s birthdays and any upcoming birthday for the next 30 days starting from today will appear.
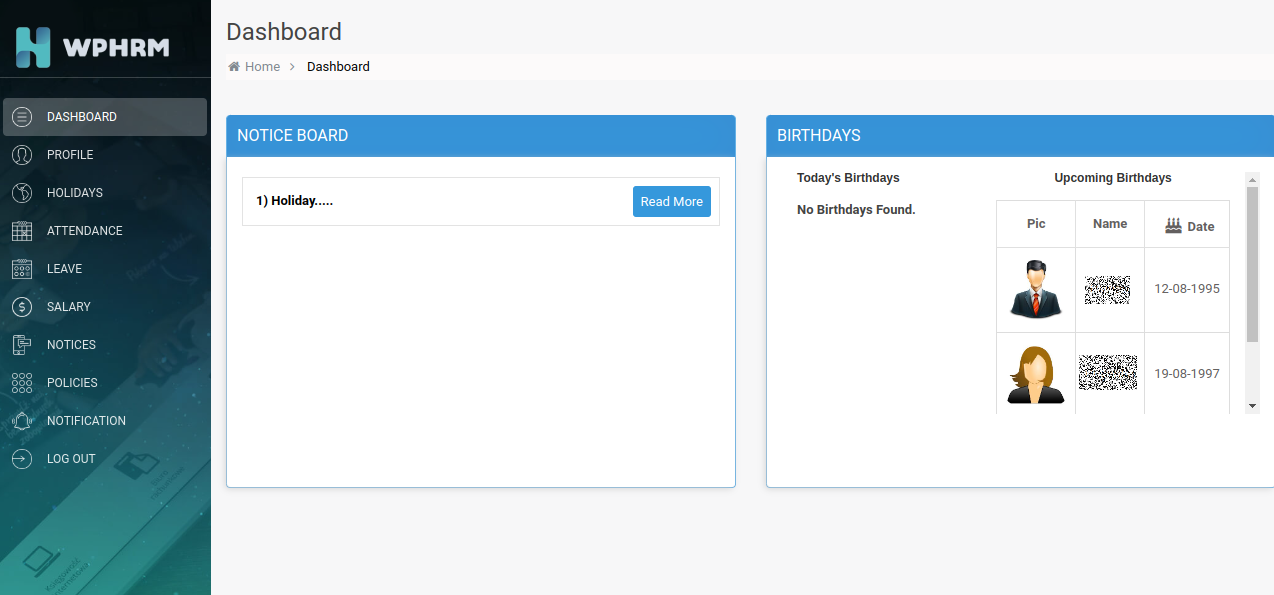
Note : If special permissions are assigned to your profile, you can switch your profile using switch button from top right corner. Use the same button to rollback to your employee account.
My Profile
After log in Employees can view their various offical records using the dashboard
Step 1 - Login to your WordPress Dashboard.
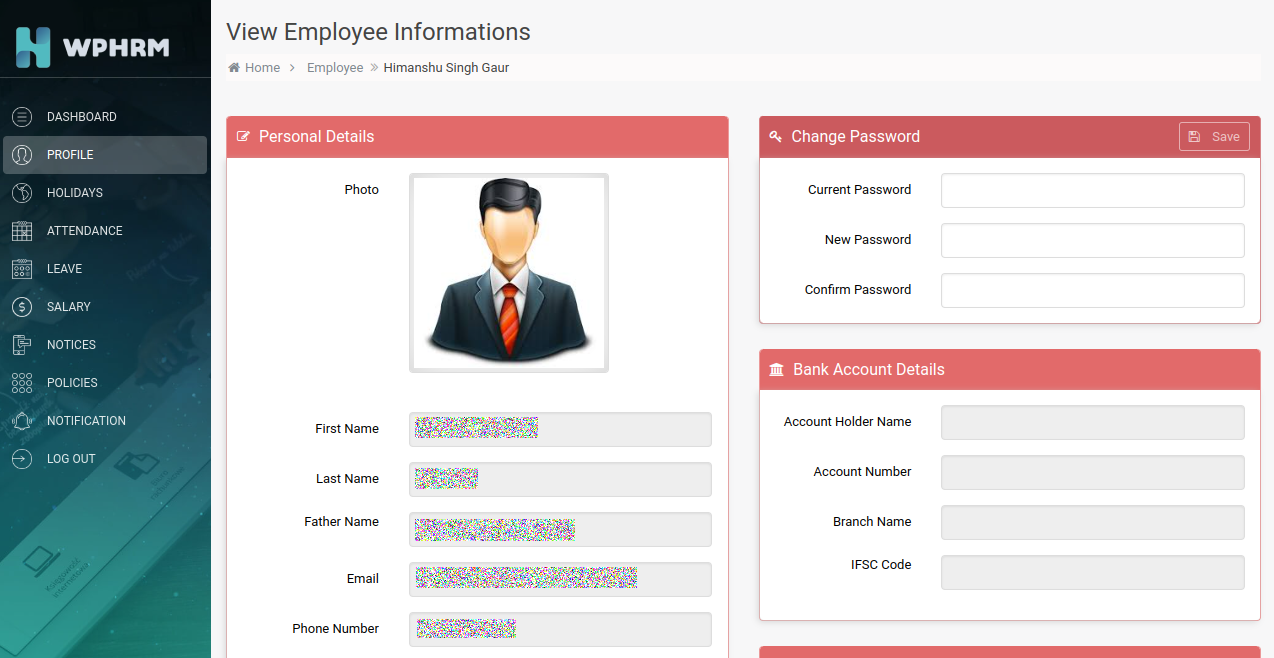
Step 2 - Go to WPHRM > My Profile. You can check your profile page which will be created by the admin. Here you can verify that all the details that you have given to the company are correct or not. You can always change or remove profile picture. The only editable fields by the user will be phone number, Local Address, Vehicle and T-shirt size. When you’re done with the changes, click on save.
Holidays
After login employees can view the upcoming holidays.
Step 1 - Login to your WordPress Dashboard.
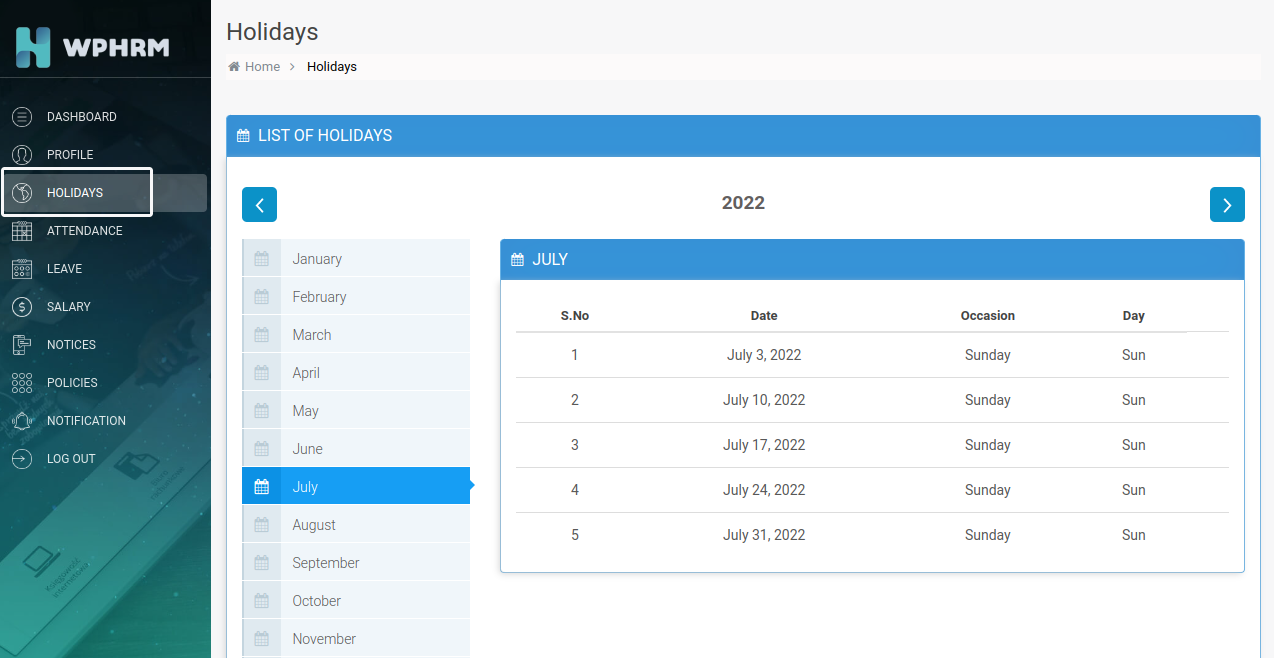
Step 2 - Go to WPHRM > Holidays. Here you can view the upcoming holidays which can be either a festival off or the weekends. You can browse through the next year holidays too.
Attendance Management
After login employees can view their attendance records in the dashboard
Step 1 - Login to your WordPress Dashboard.
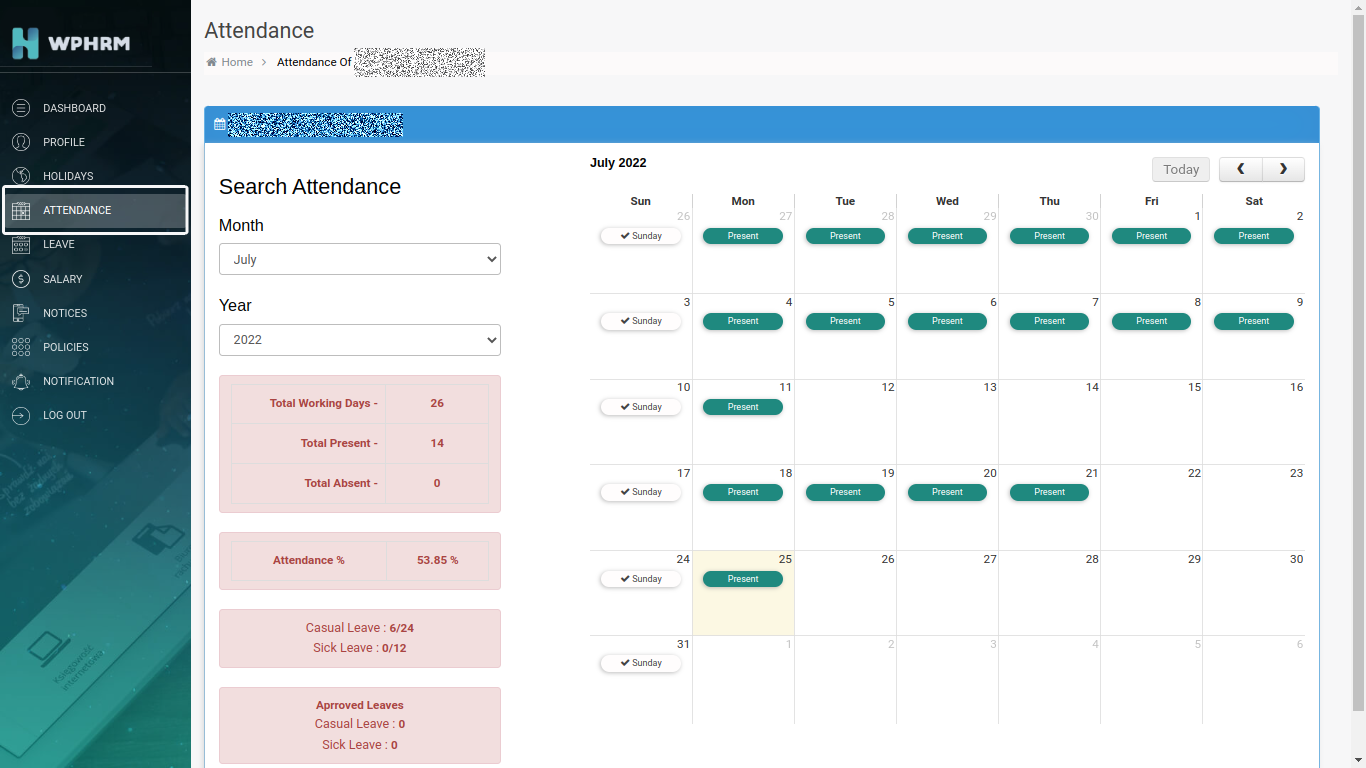
Step 2 -Go to WPHRM > Attendance Management.You will find a calendar view which will describe your total absent and present in the current month. Using search, you can browse through previous months and years.
Leave Management
After login Employees can view their total applied/approved leaves the dashboard
Step 1 - Login to your WordPress Dashboard.
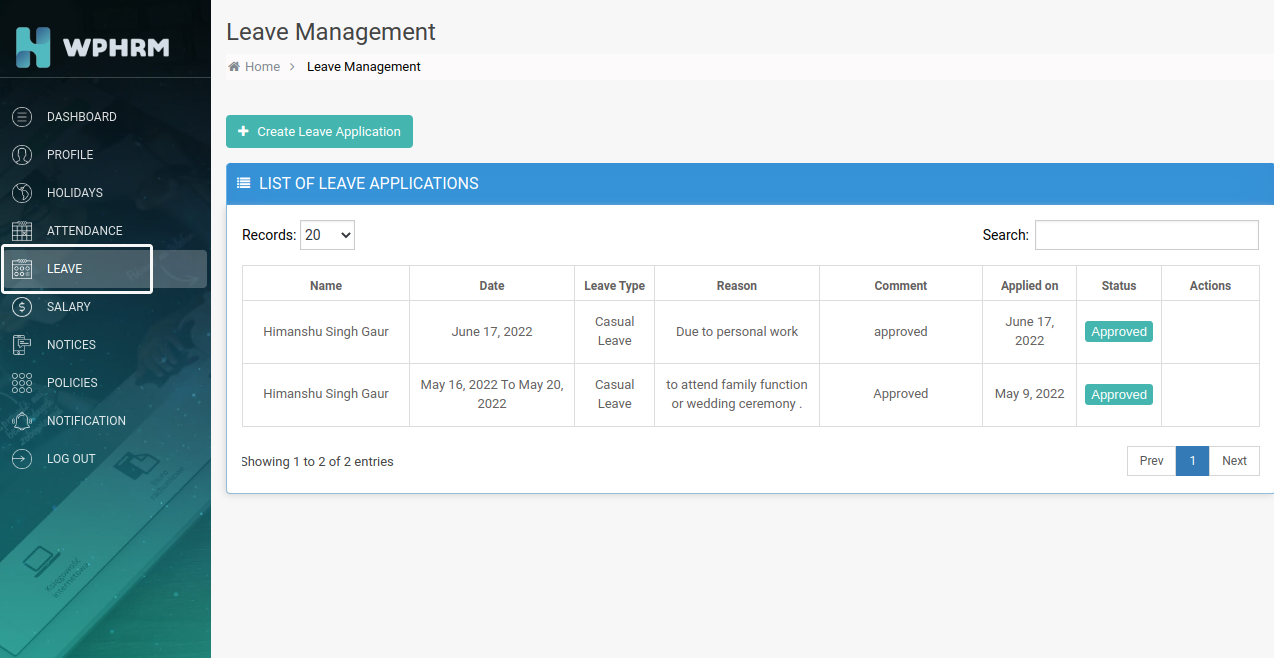
Step 2 -Go to WPHRM > Leave Management .You will be able to see your applied leave and its approval status here. You can also delete your applied leave using the delete button, before it is approved or rejected.
Step 3 -To appply for a new leave click on Create Leave Application. You will get a pop up where you can select days and apply for a Bulk Leave, One Day Leave or Half Day Leave. When you’re done, click on the Apply Leave button to apply. You can also apply for a halfday leave on the same day.
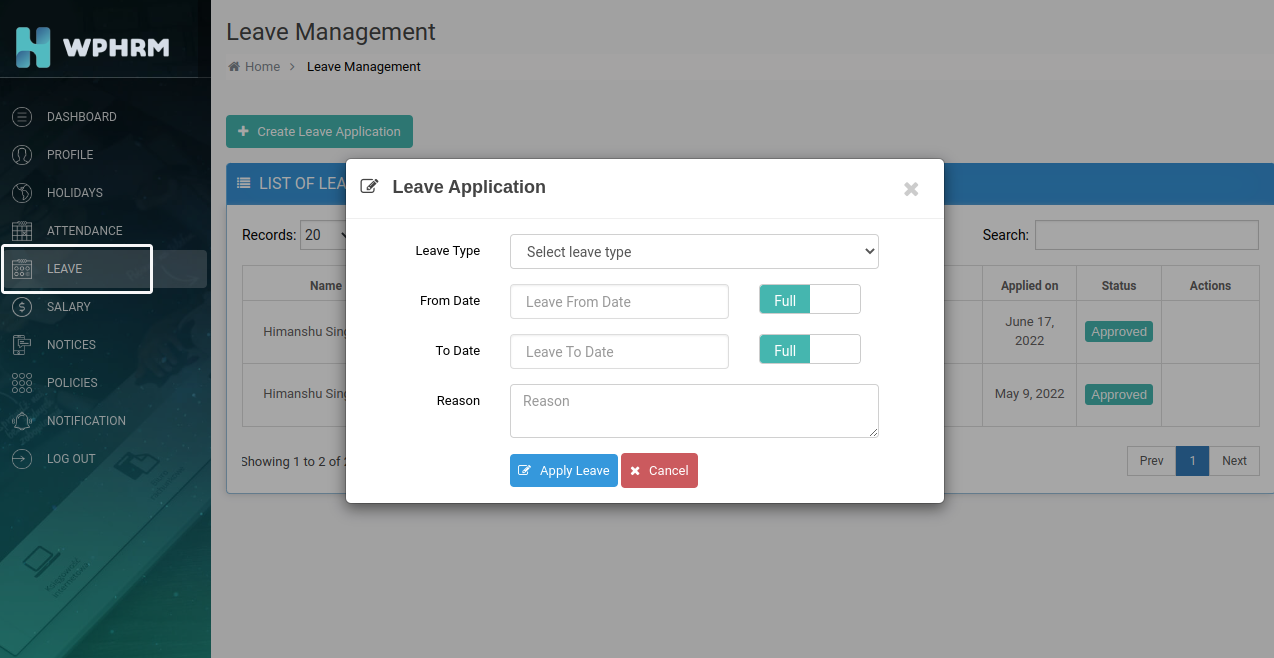
E.g.
1. To mark leave in bulk, select the dates you wish to apply leave for and click on Apply Leave. Keep the toggle to Full and all the days will be considered as full day leave.
2. To apply one particular day as half day leave and rest of the days as full leave, change the From Date or To Date leave status to Half and the rest one as Full, as per your preference of leave.
3. Keep Both the toggle to Half and set the starting date and ending date, the rest of the days fall between will be considered as full day leave.
4. To apply for Half day leave select the date in From Date field and the same date will be copied in To Date field, just switch the toggle from Full to Half and click on Apply Leave.
Salary Management
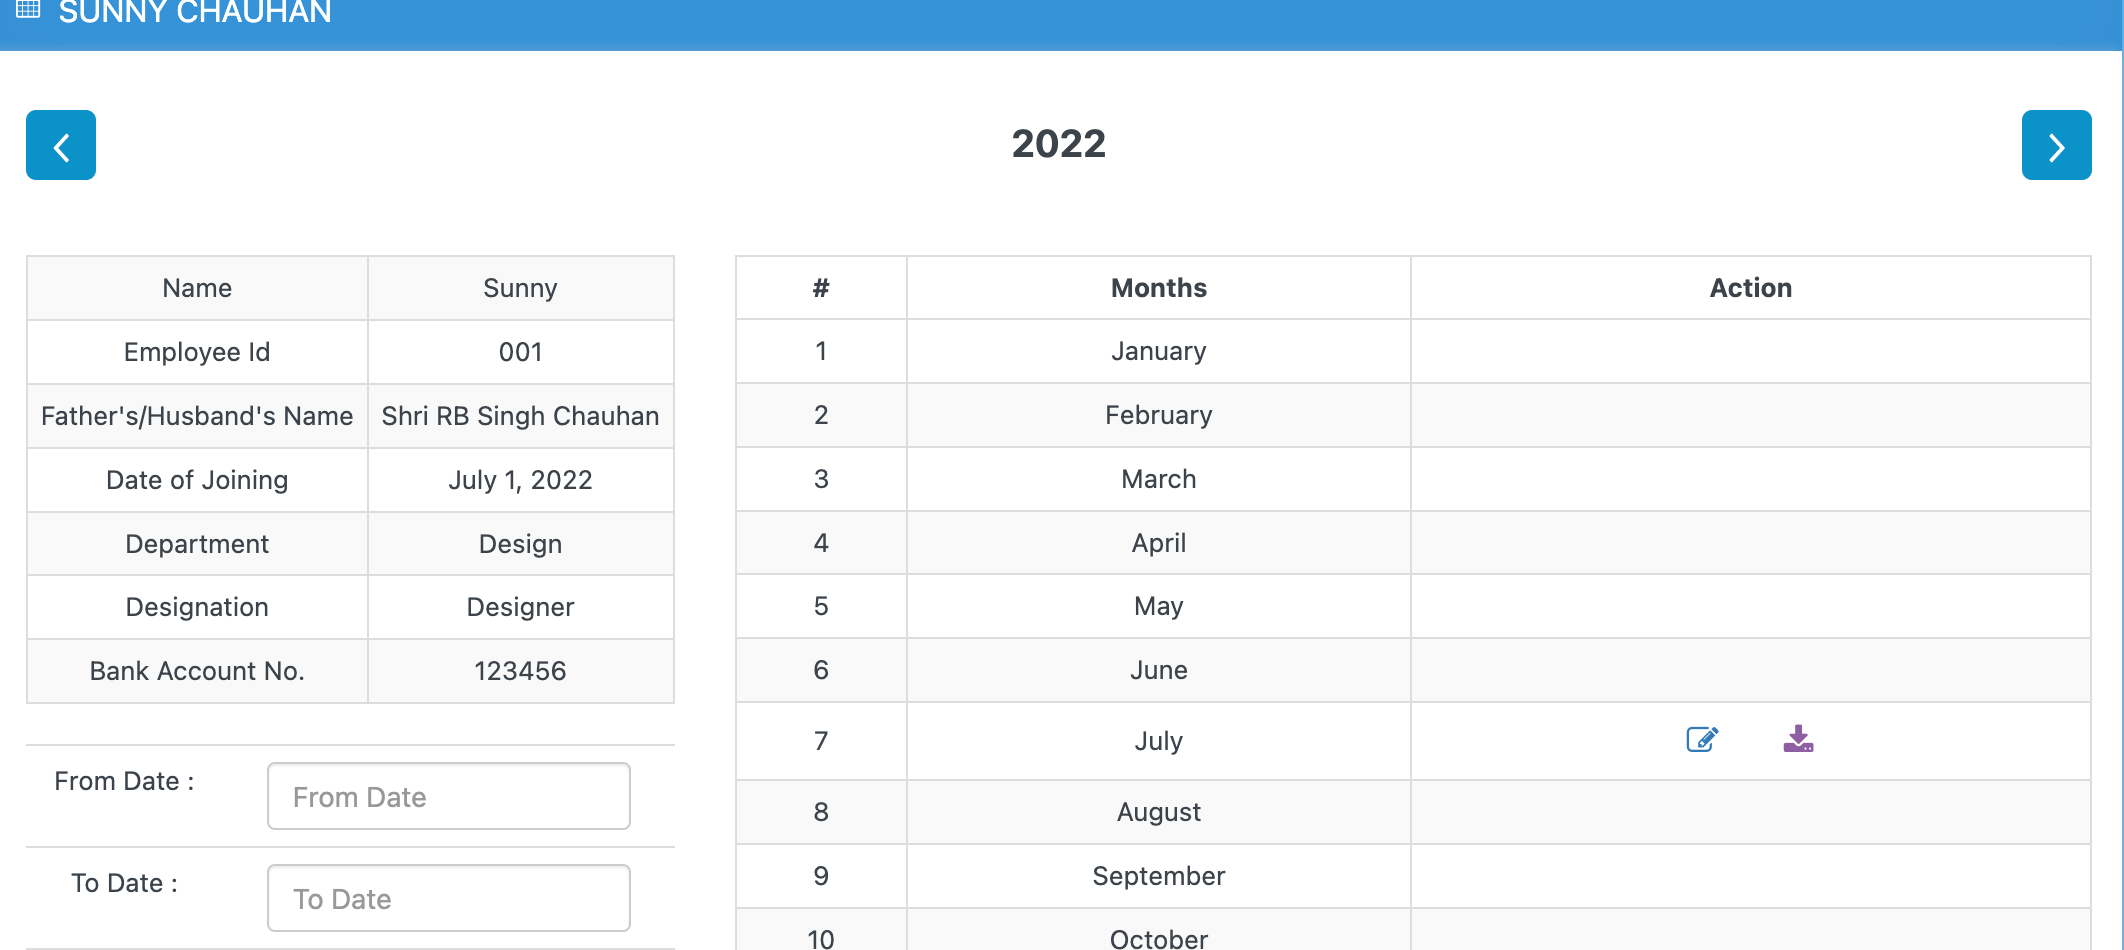
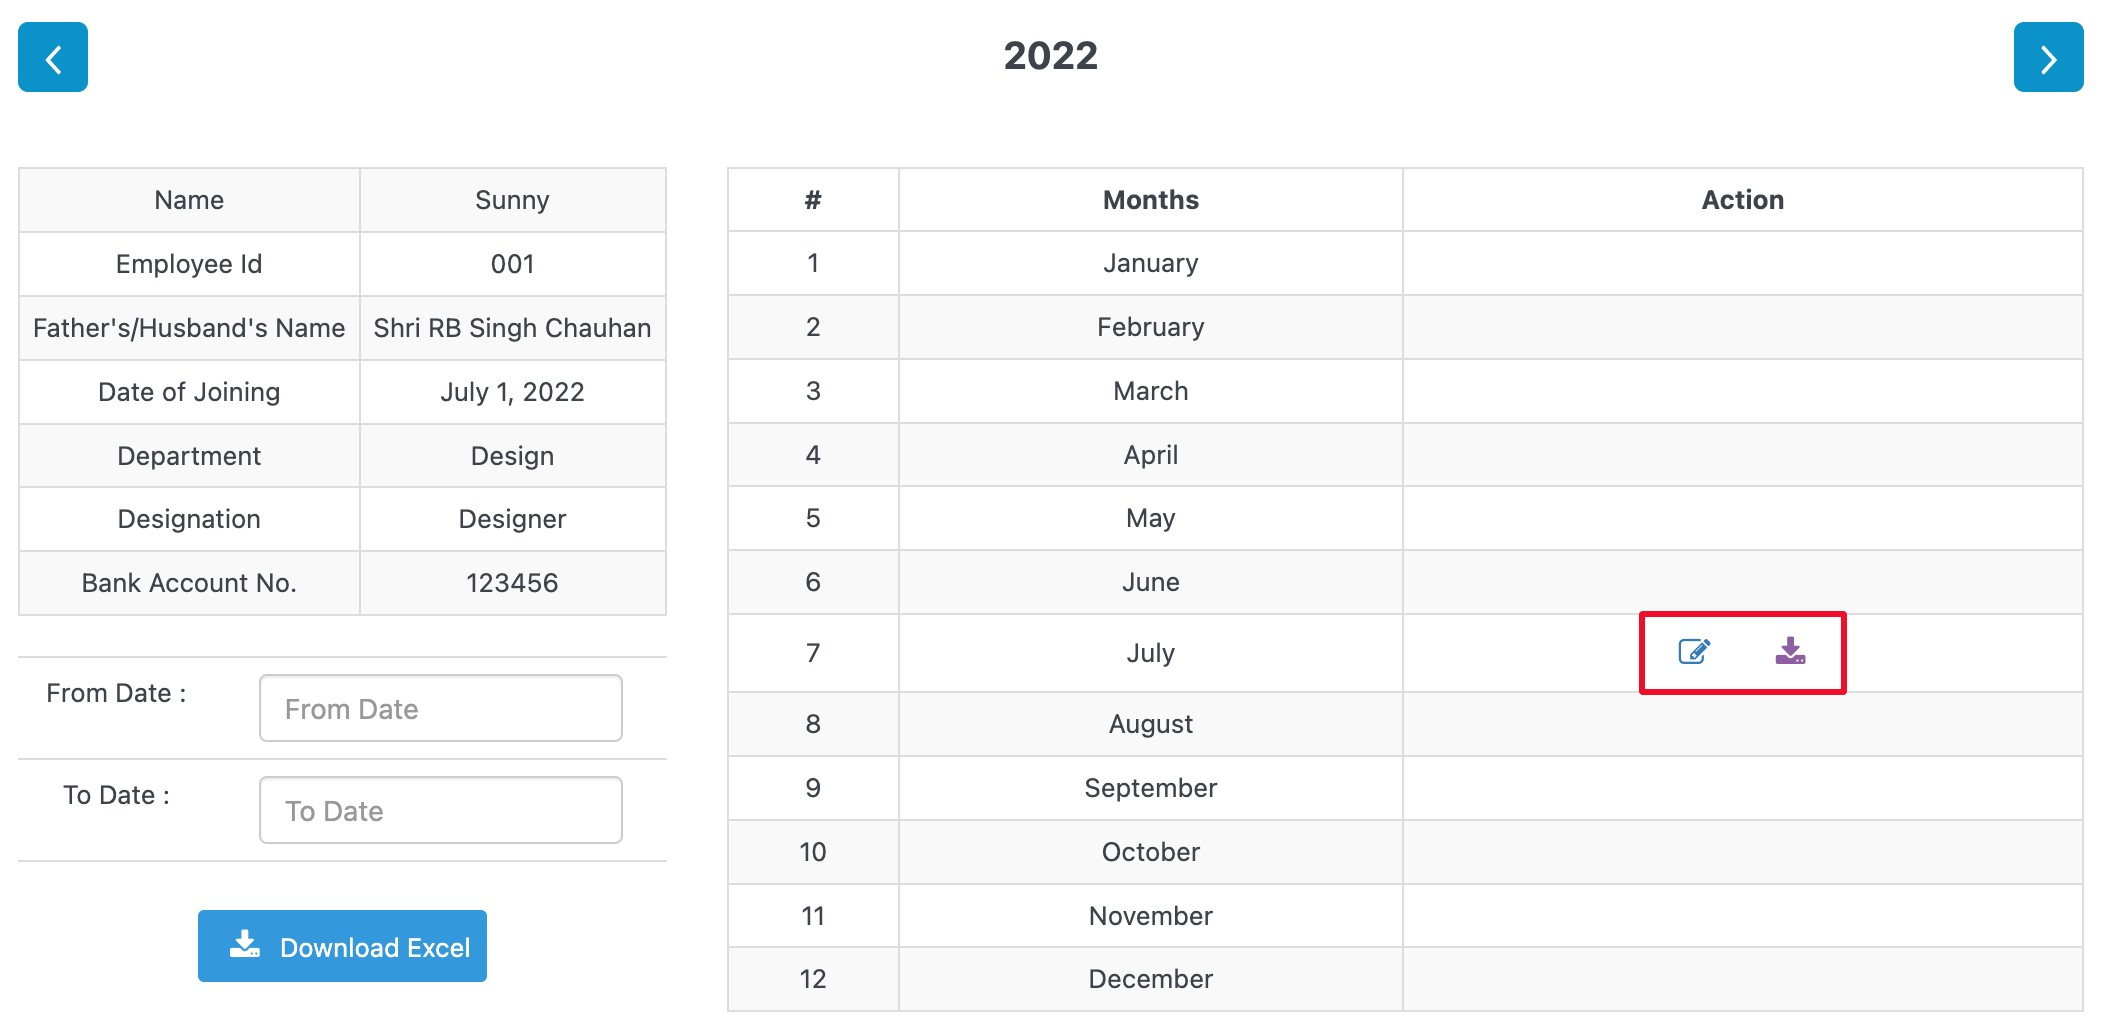
After login employees can view/download their salary slips using the dashboard
Step 1 - Login to your WordPress Dashboard.
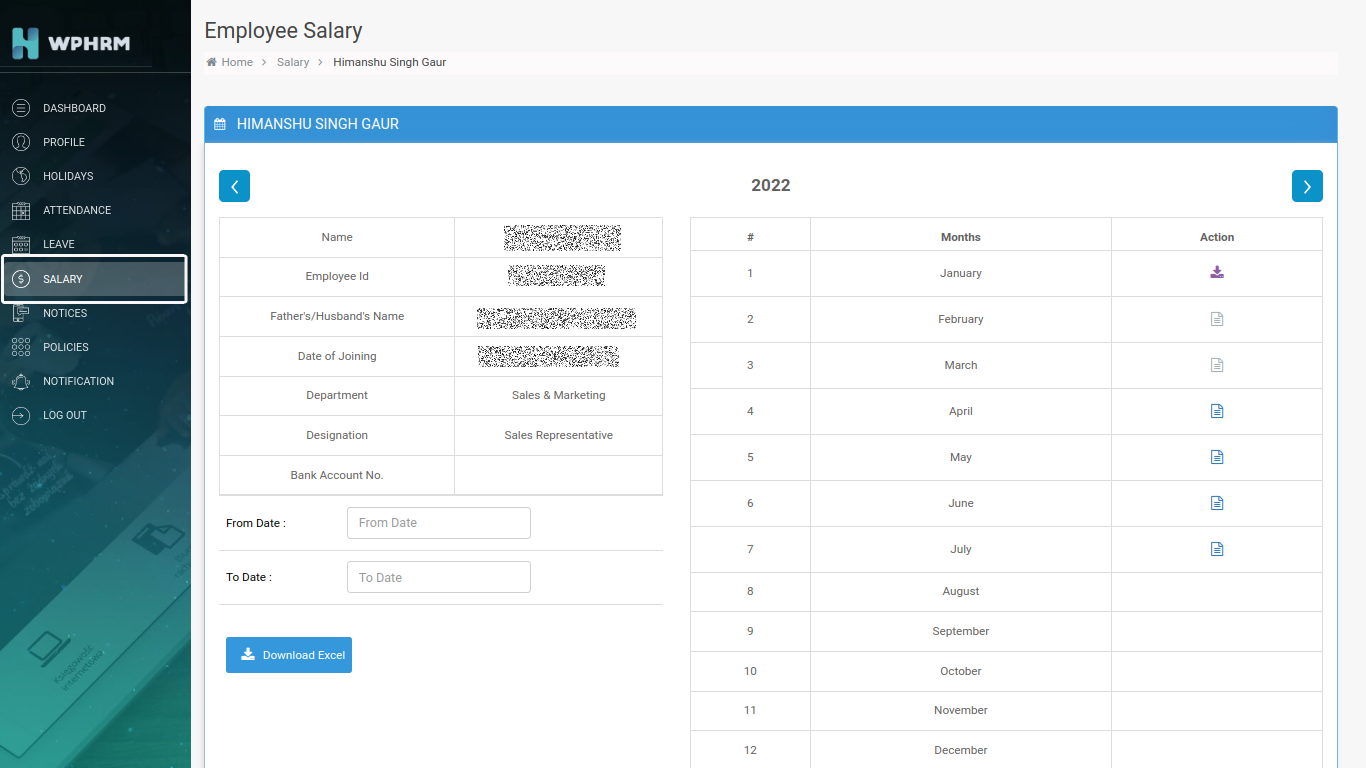
Step 2 -Go to WPHRM > Salary Management.You can find all your salary slips here. If the request button is faded that means you have already requested to the admin for that month’s salary slip. If it is dark blue, then you are yet to request. If the admin has already generated the salary slip then you will be able to download it.
Using the search option you can download the complete summary of months and years.
Notices
After login employees can view important notices issued by the admin in the dashboard
Step 1 - Login to your WordPress Dashboard.
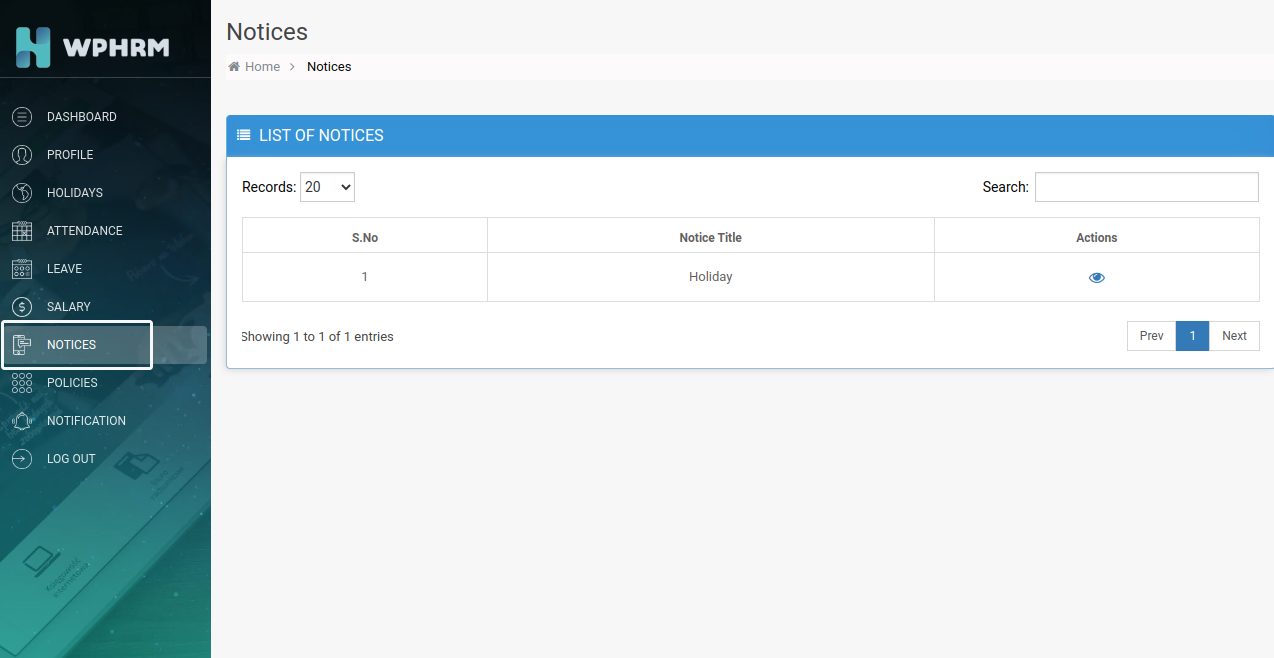
Step 2 -Go to WPHRM > Notices .Here you will find all the notices that will be published by the admin while on the dashboard only top three will be visible.
Notifications
After login employees will be able to receive important notifications in the dashboard so that they do not miss any important announcements.
Step 1 - Login to your WordPress Dashboard.
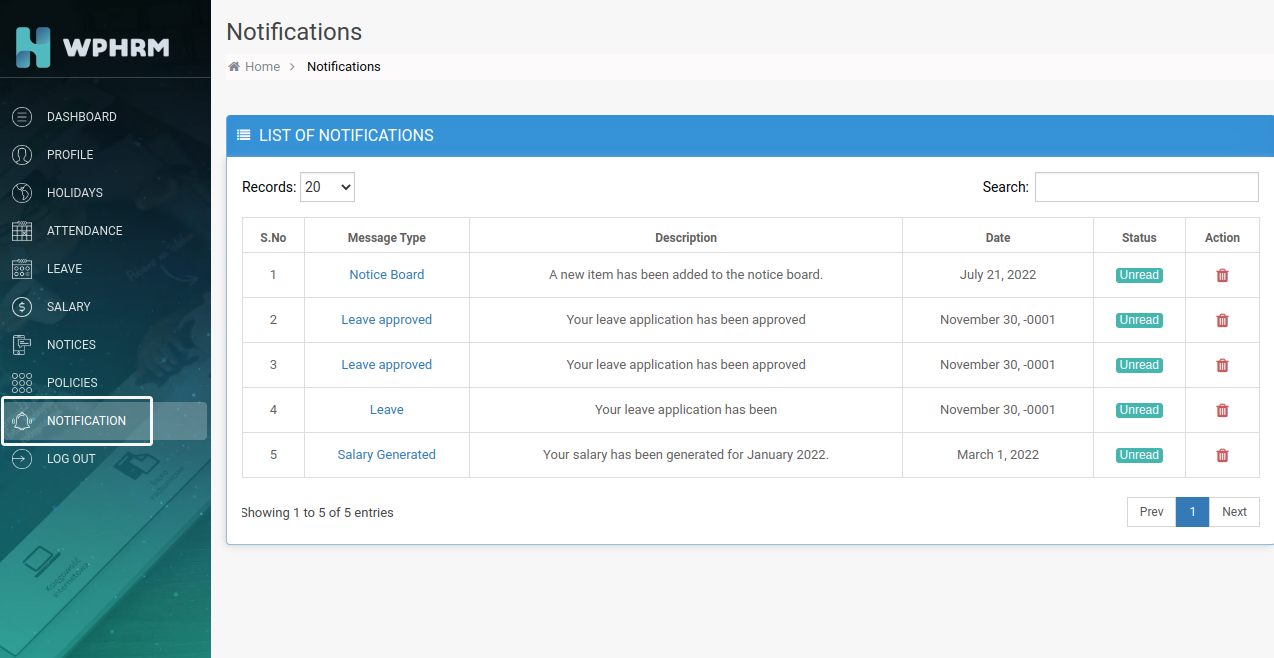
Step 2 -Go to WPHRM > Notifications .All the notifications such as your leave approvals and new notices will be displayed here. Only the notifications will be shown here. To view the delayed notice, go to the Notice Board.
Dashboard
After login Admin can view their various offical records using the dashboard
Step 1 - Login to your WordPress Dashboard.
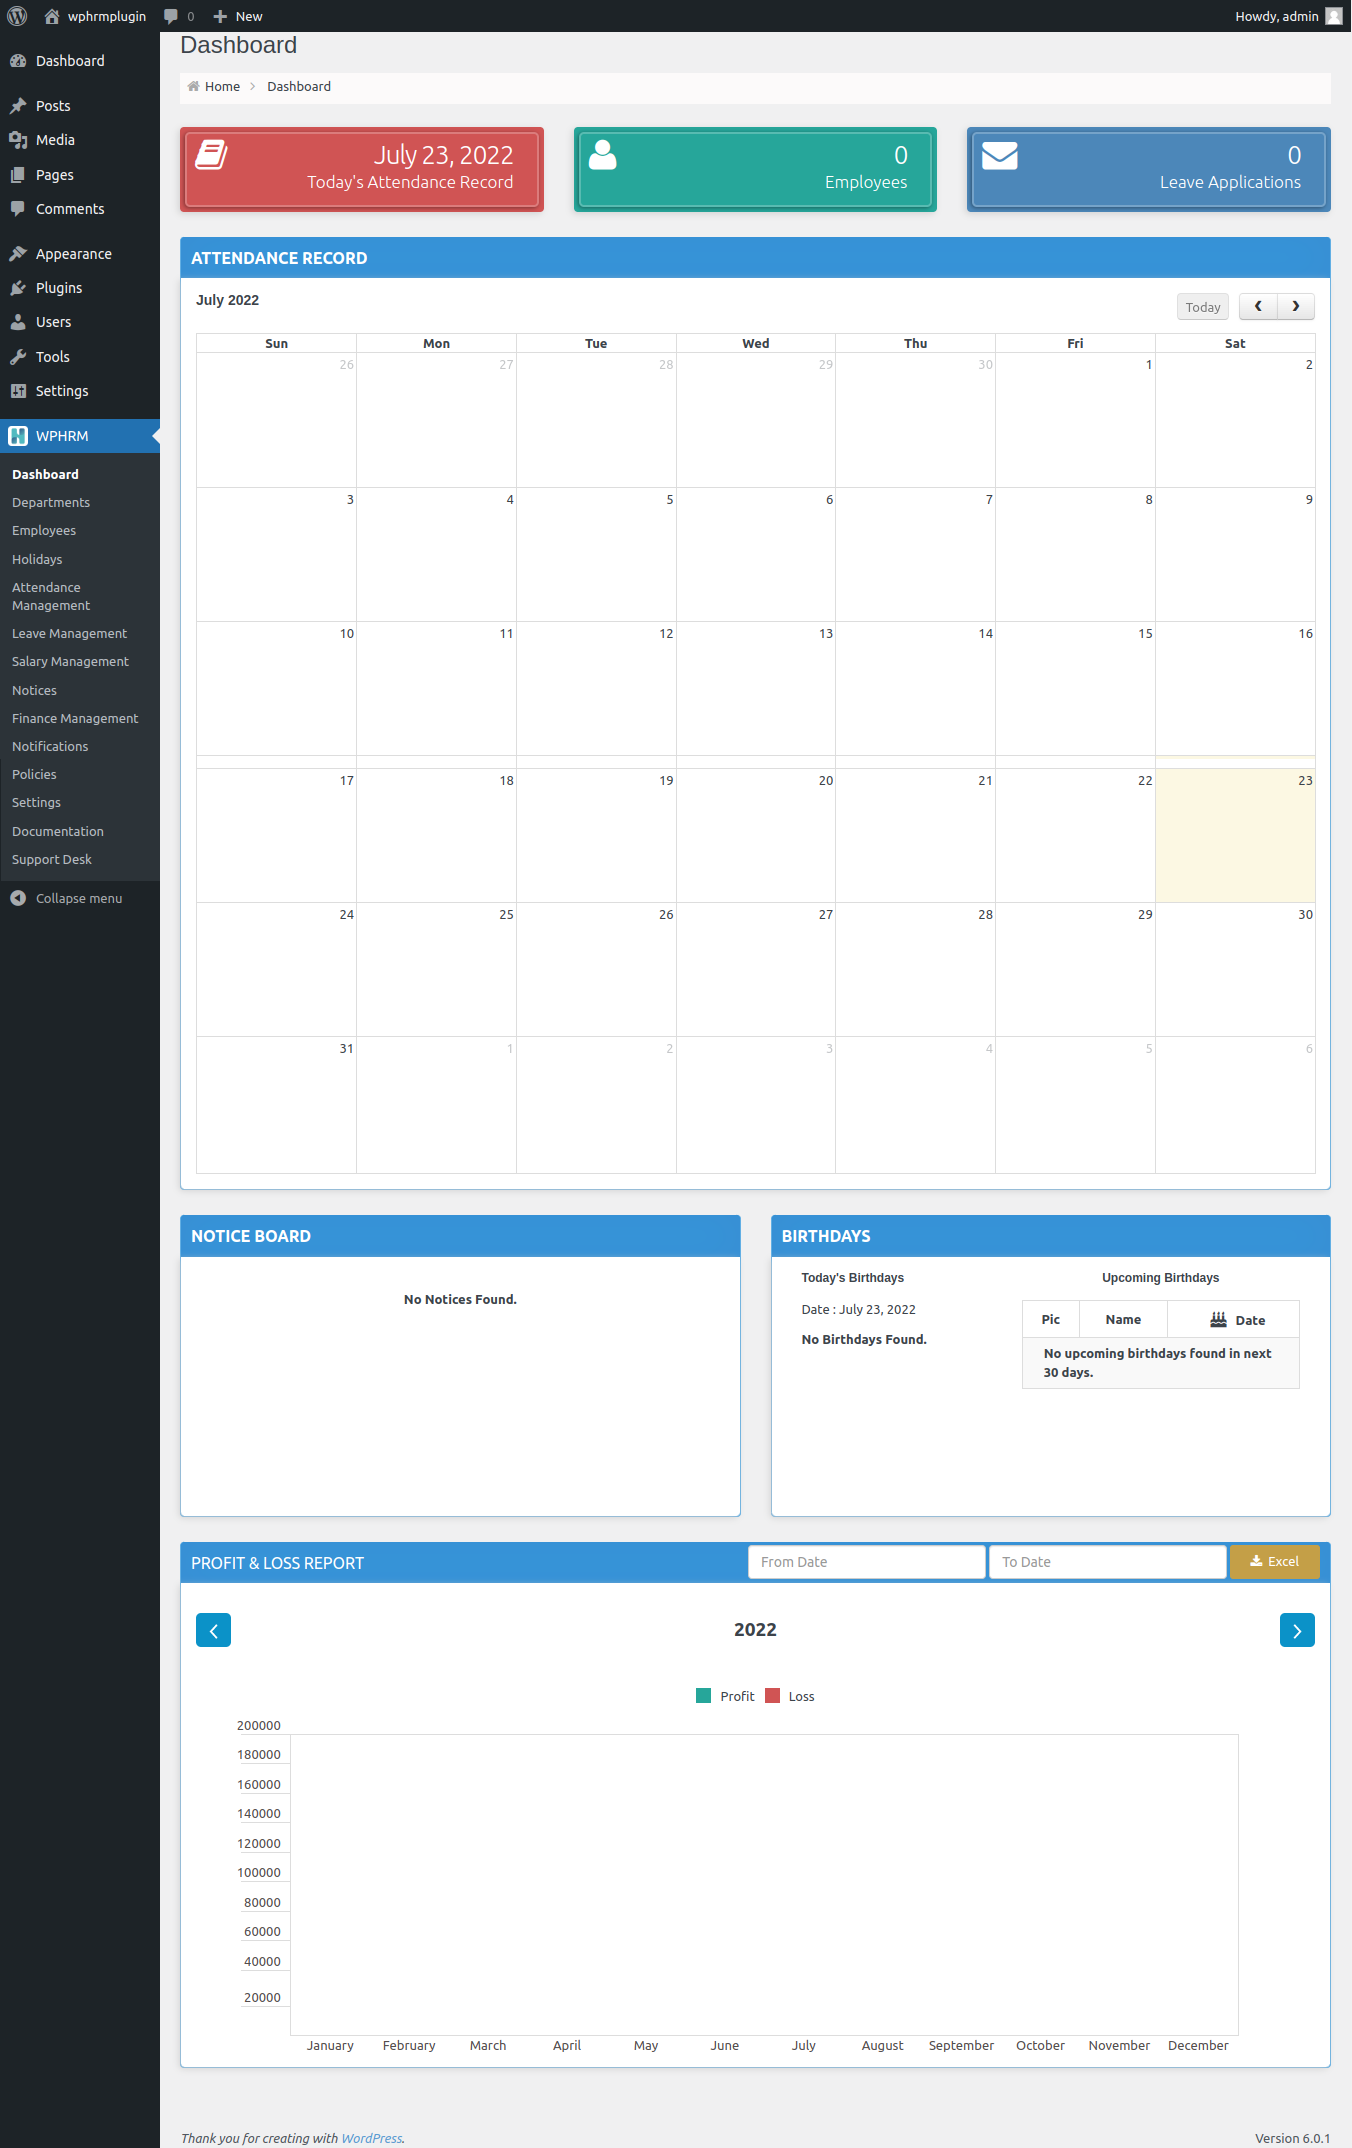
Step 2 - Go to WPHRM > Dashboard.
– The Dashboard displays multiple notifications which helps you in handling your daily activities.
– At the top of the page you will find present day's attendance details along with total number of employees present/absent and the upcoming/unapproved leave applications.
– The calendar gives a bird eye view of the current month’s attendance activity. If you will click on the Absents, Halfday or Present , you will be redirected to the relevant page where detailed information will be provided.
– Any new notices that will be forecasted will be visible in the Notice Board panel and by clicking on it, you will see more details of it.
– In the Birthdays panel present day's birthday and any upcoming birthday for the next 30 days starting from current date will be visible.
– Finance Management will give you an overall summary of the expenses that have been made during the whole year.
Note : If special permissions are assigned to your profile, you can switch your profile using switch button from top right corner. Use the same button to rollback to your employee account.
Department
You can easily add any number of Departments along with the multiple designations under each department. Please follow the below instructions.
Step 1 - Login to your WordPress Dashboard.
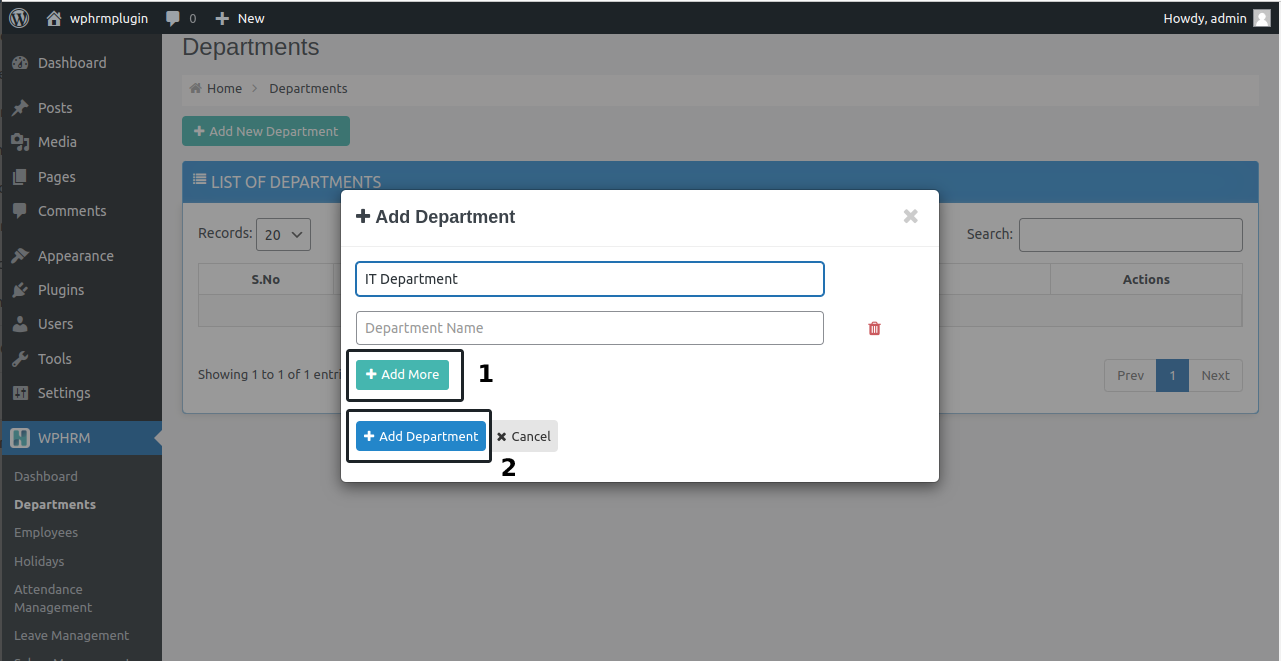
Step 2 - Go to WPHRM > Department. To add a new department, click on Add New Department.Here you can add departments in bulk.
Step 3 - You can add multiple departments by clicking on Add More buttons. After adding the departments click on Add Department button.
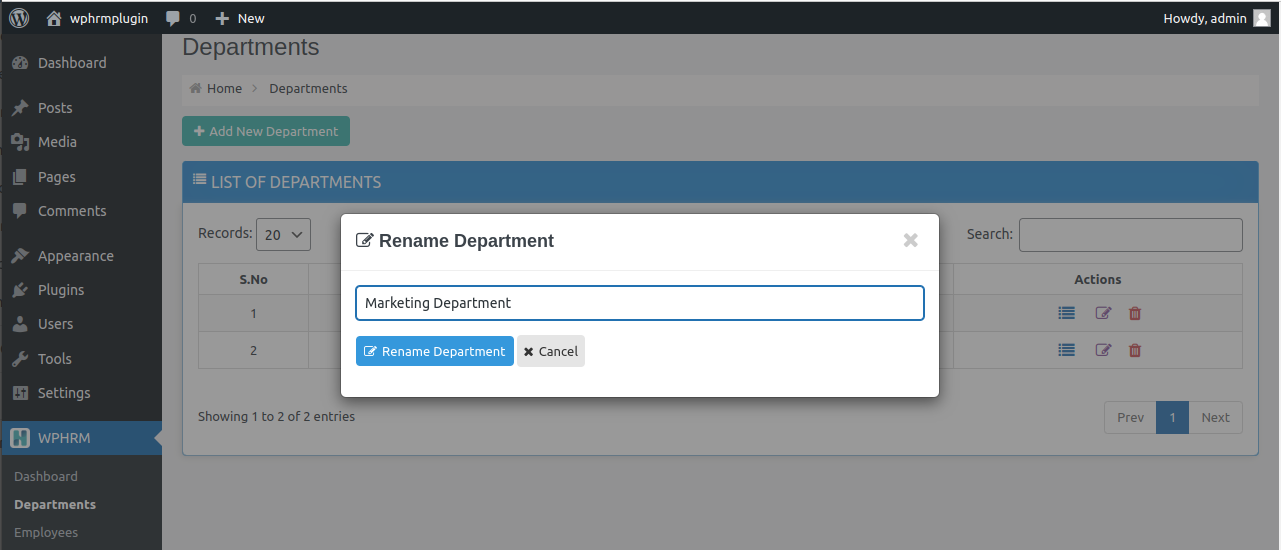
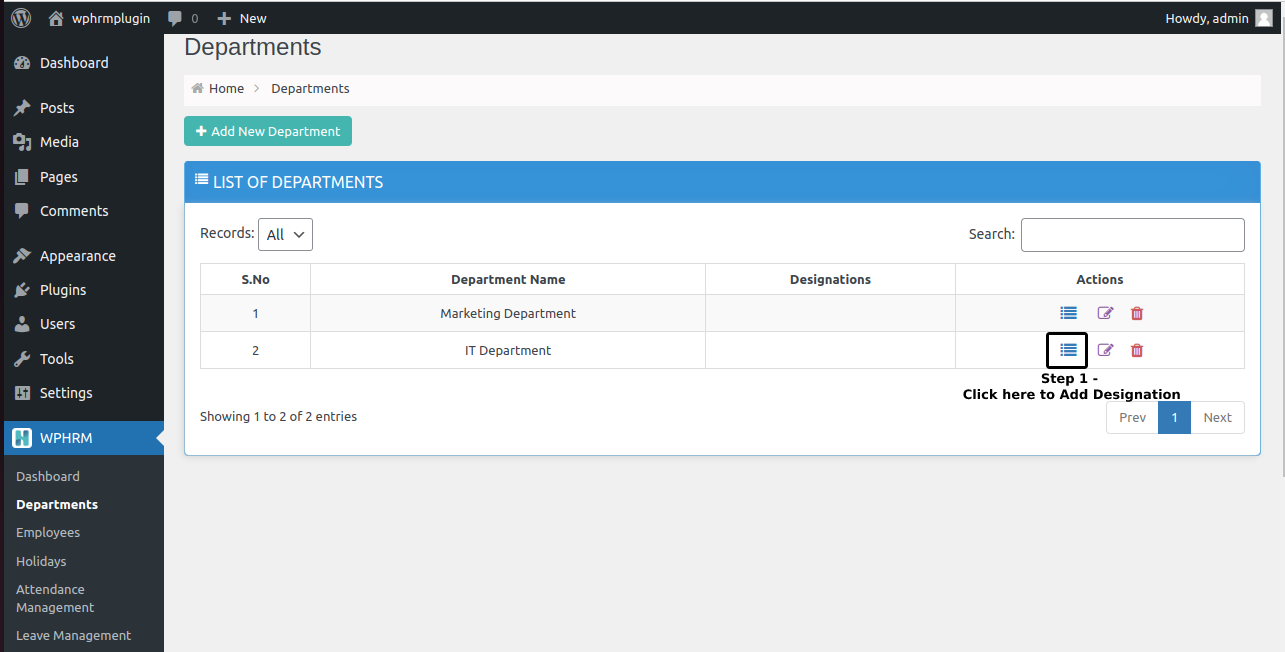
Step 4 - When it’s done, you can assign designations to a particular department. You can also rename or delete the added departments.
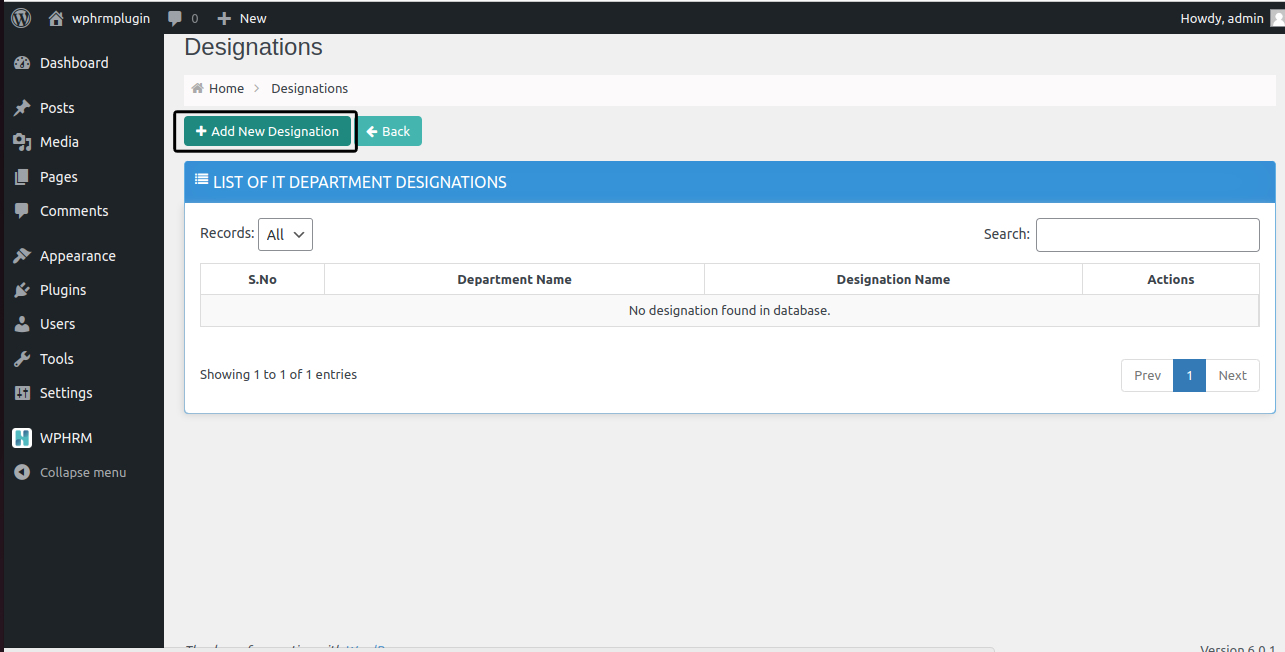
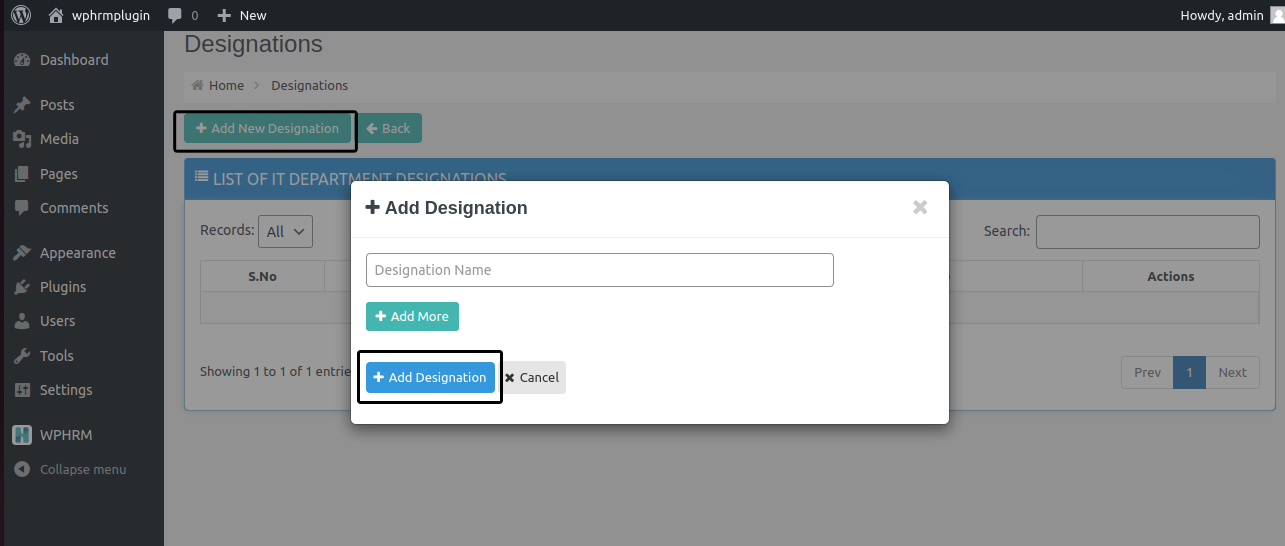
Step 5 - Click on Menu icon under actions and add the designations the same way you have added the departments. After adding the designations, click on Add Designation to save the records.
Employees
You can easily add any number of Employees. Please follow the below instructions.
Step 1 - Login to your WordPress Dashboard.
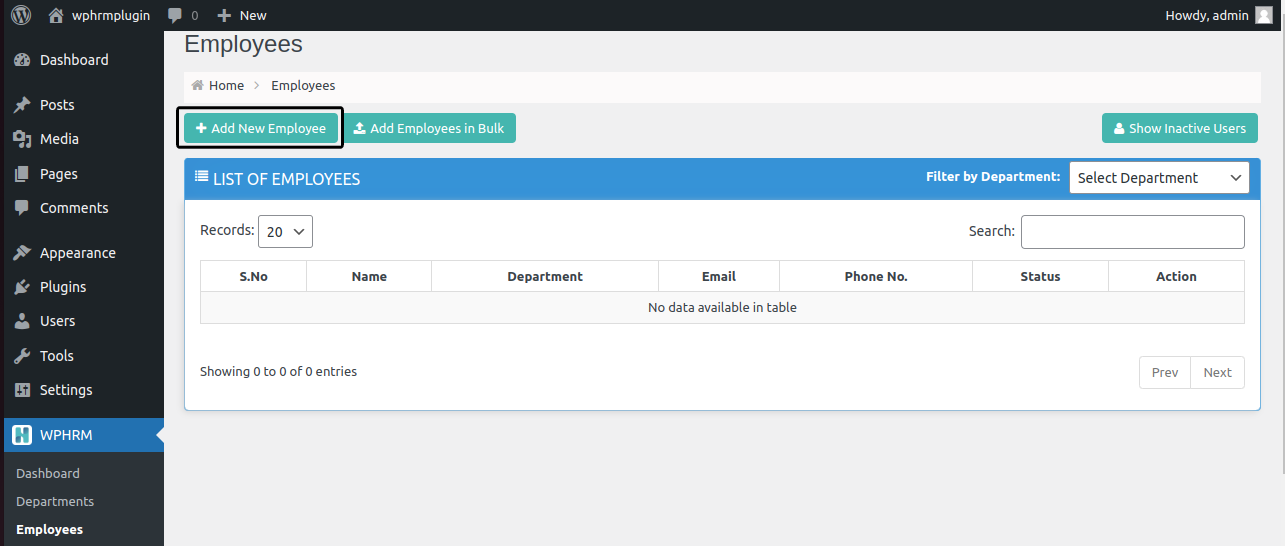
Step 2 - Go to WPHRM > Employees. To add a new employee, click on Add New Employee, You will find the complete employee list here with their status whether they are active or inactive.
Step 3 - You can add all the important details such as photo, salary and bank details etc. Attachment option allows you to attach the relevant documents as per your requirements. Once it’s done, click on Save and your data will be stored in the database. All other sections have SAVE buttons too, but those buttons will get acivated only when you save Personal details section.
Note: Assign the user role carefully. Default role for all users should be Subscriber. You can create a specific role from settings area and assign permission to employees.
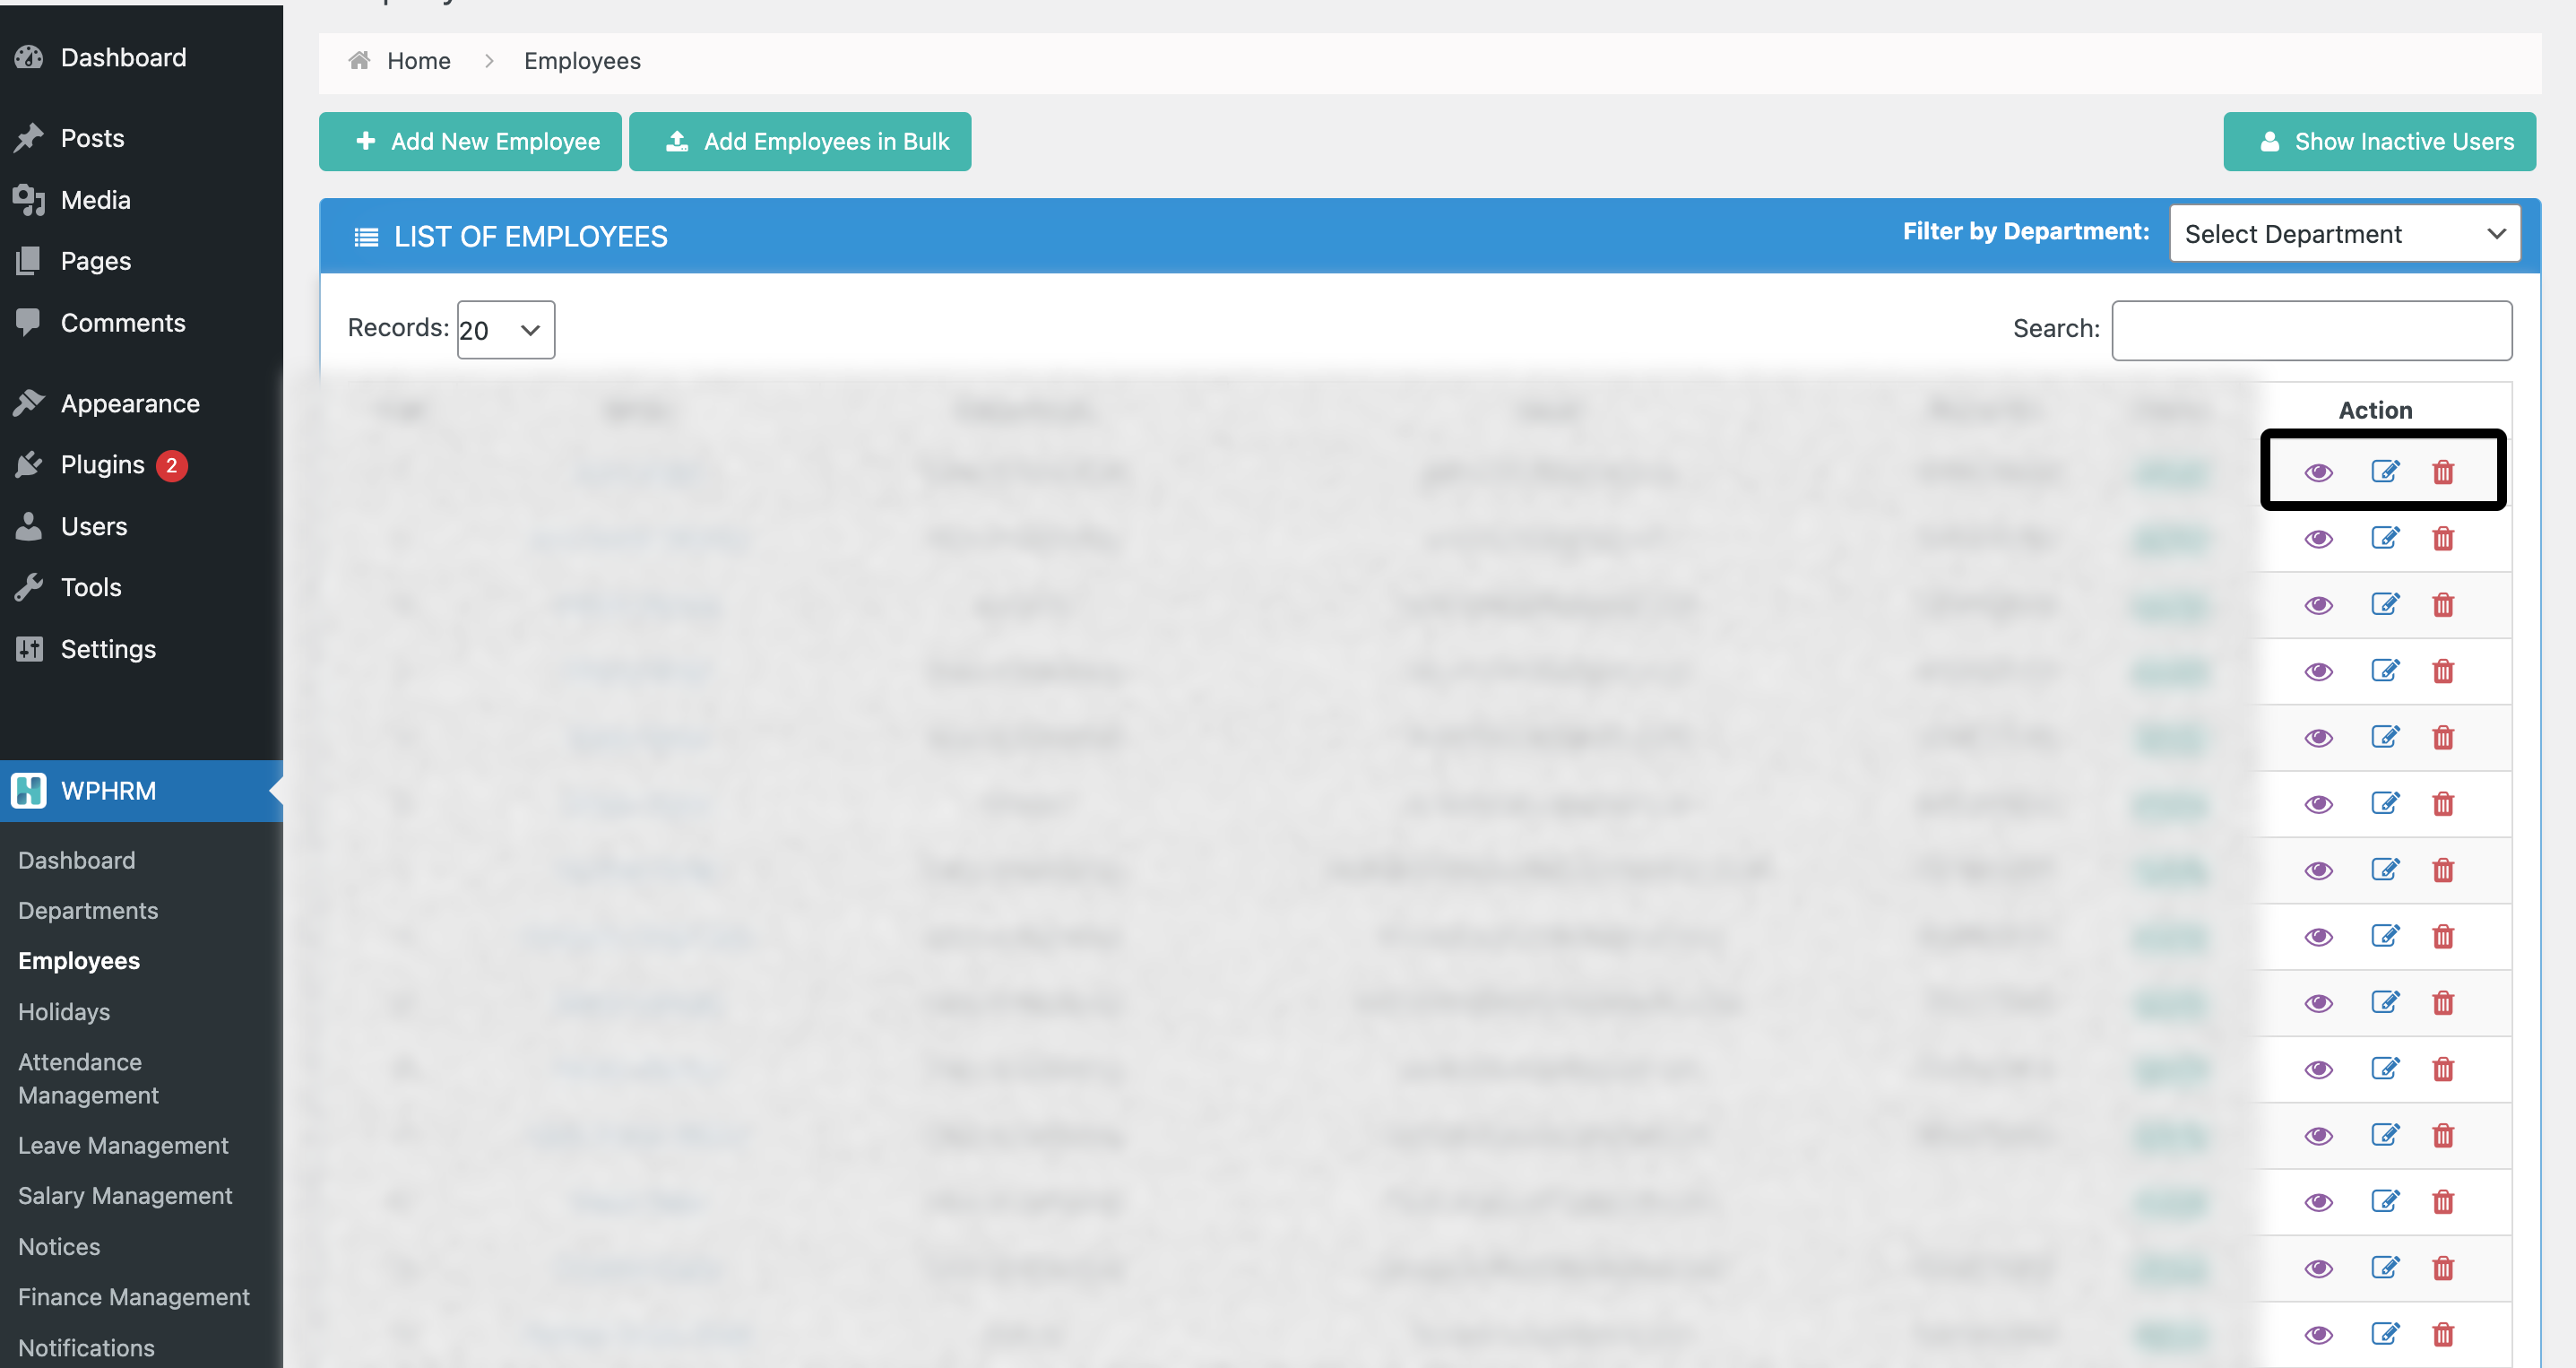
Step 4 - If you want to View or Edit the employee profiles that you have created, it is just one click away under the Employees tab.
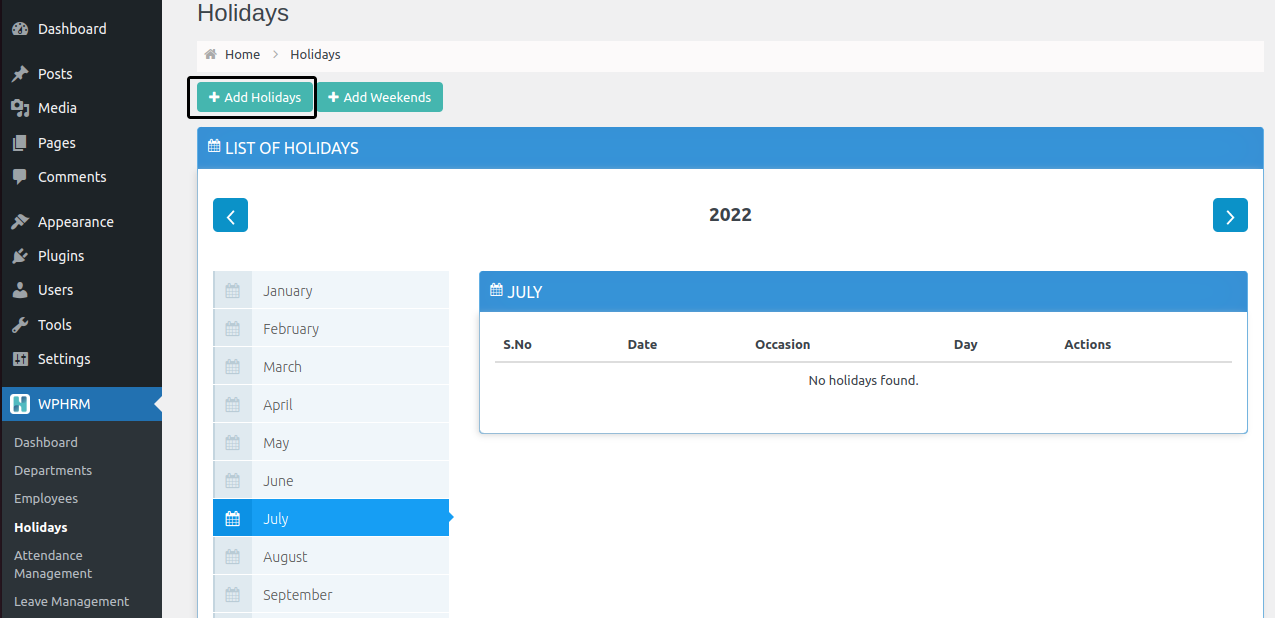
Holidays
You can easily add and edit Holidays according to your country and office rules. Please follow the below instructions.
Step 1 - Login to your WordPress Dashboard.
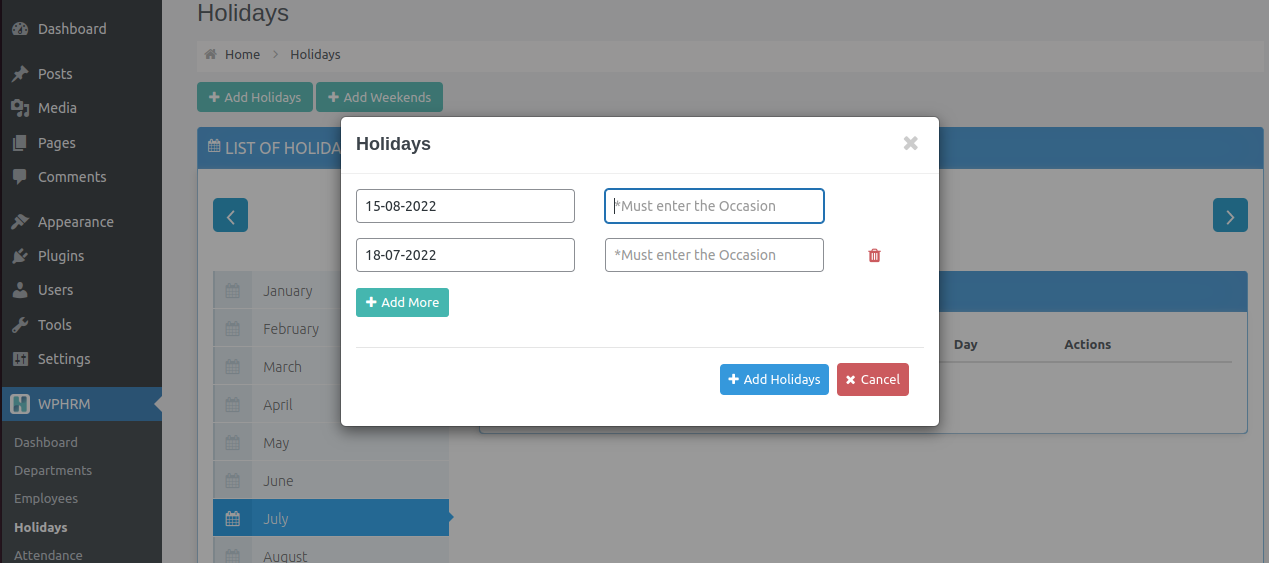
Step 2 - Go to WPHRM > Holidays. Here you can add the holidays as per the festivals and public holidays in your country. Click on Add Holidays and pop up will appear, where clicking on date will open a calendar from where you can pick a date and add the description in the occasion field.
You can add all the holidays at once using Add More button. After adding the holidays, click on Add Holidays button to save them.
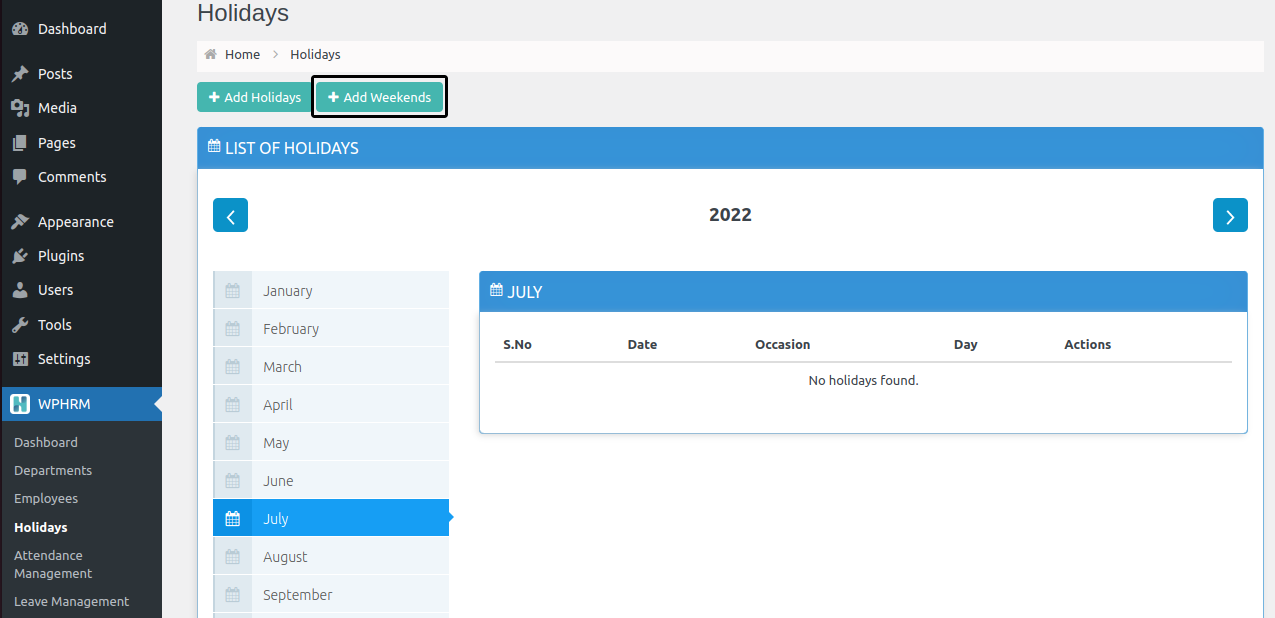
Step 3 - You can add all the weekends or weekdays falling during the whole year at one easy go. Once you’re done, just click on Add Weekends.(see the screenshot below)
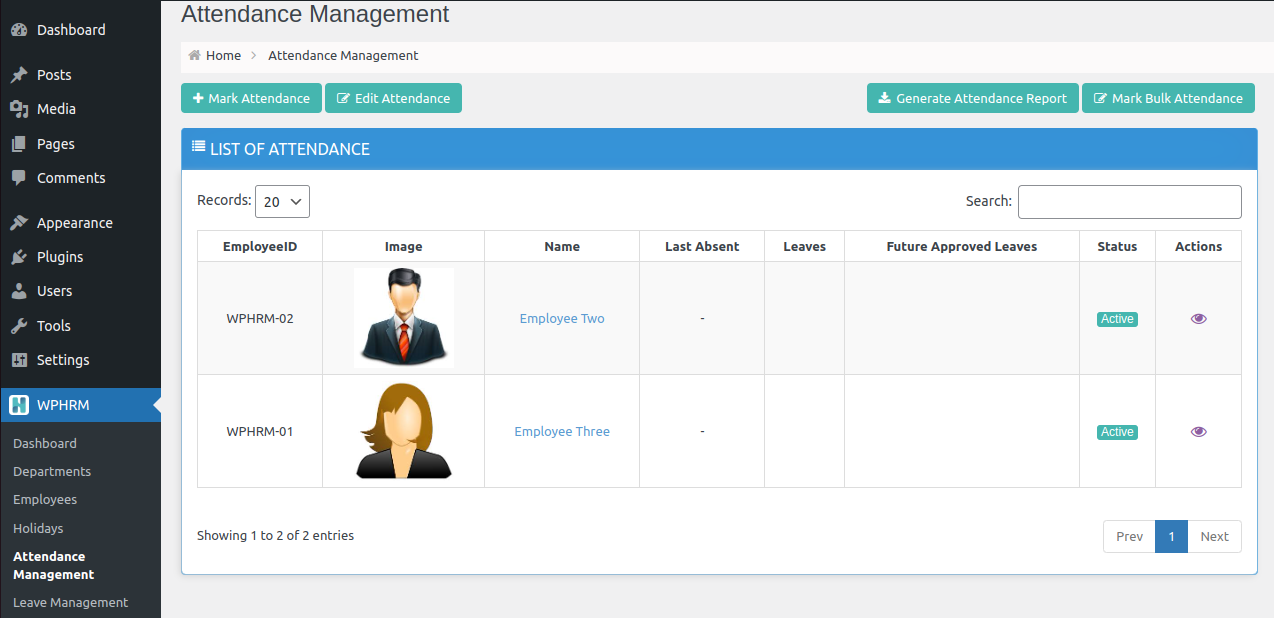
Attendance Management
You can easily mark attendance with WPHRM. Please follow the below instructions.
Step 1 - Login to your WordPress Dashboard.
Step 2 - Go to WPHRM > Attendance Management. Using attendance management you can mark and view the attendances of the employees that you have added earlier.
Note: You can enable auto-attendance marking feature from settings area under General tab.
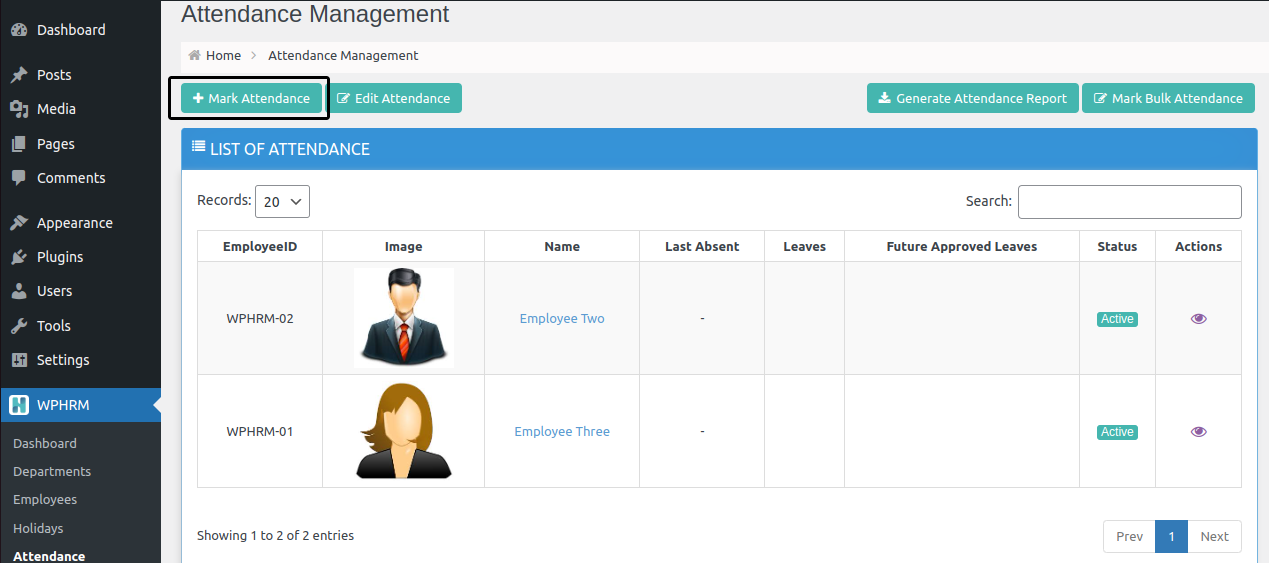
Step 3 - To mark attendance for a particular day, click on Mark Attendance. For those who are absent for the day can change their status from Present to Absent like shown in the screenshot. Once done, click on Submit. In case if you don’t enter Leave Type and Reason for the absent candidates by default it will be considered as paid leave.

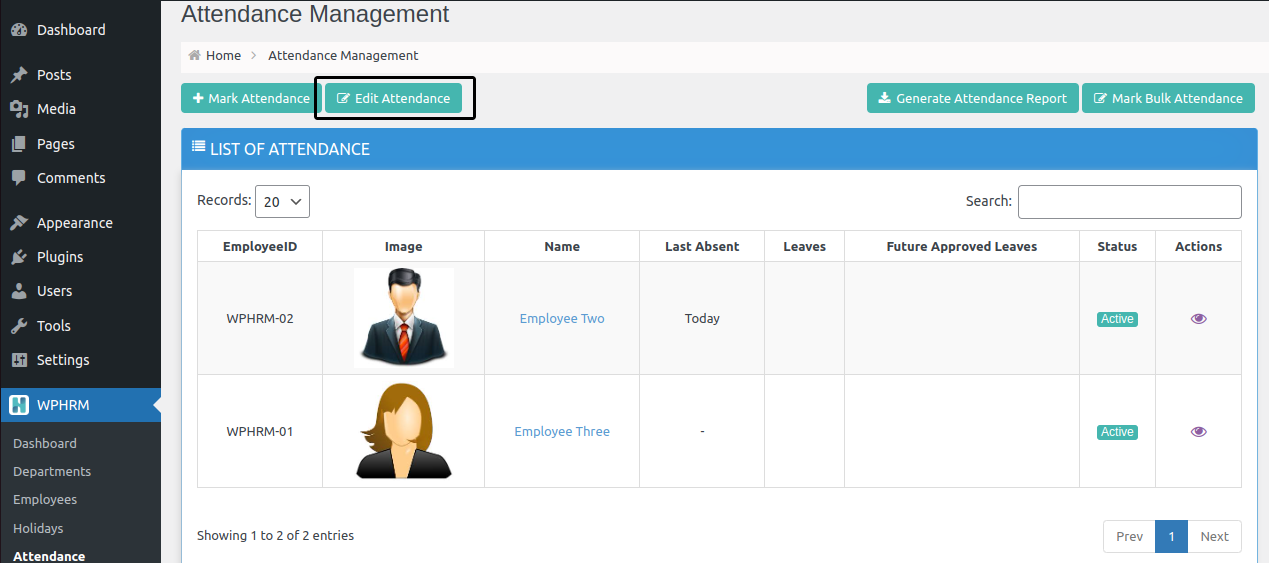
Step 4 - In case if you want to make changes in the previous marked attendances, click on Edit Attendance. You need to pick a date from the Select Date option available on the top right corner. Choose a date and you will be able to edit the attendance of that particular day.
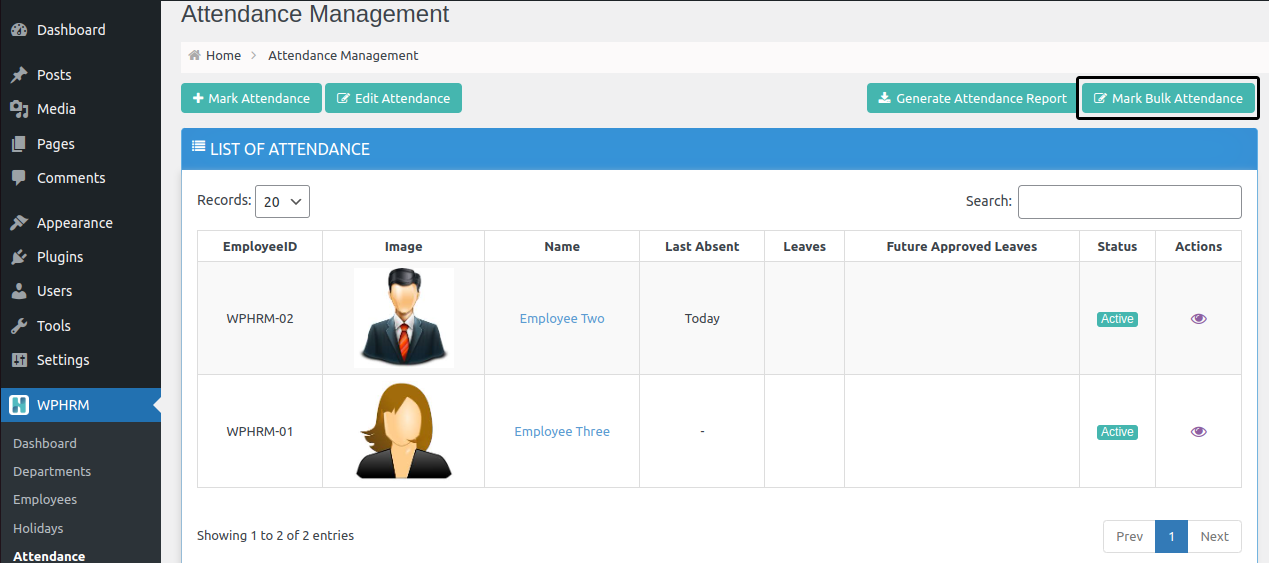
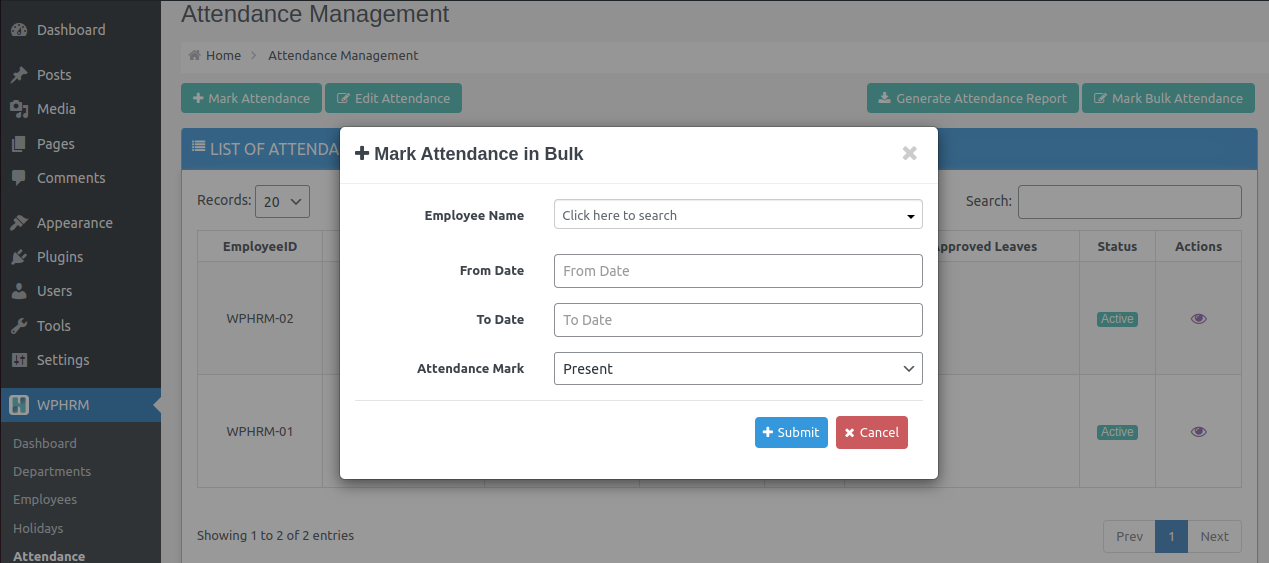
Step 5 - You can mark the attendance in bulk using the option shown below. Just pick the dates and click on Submit button.
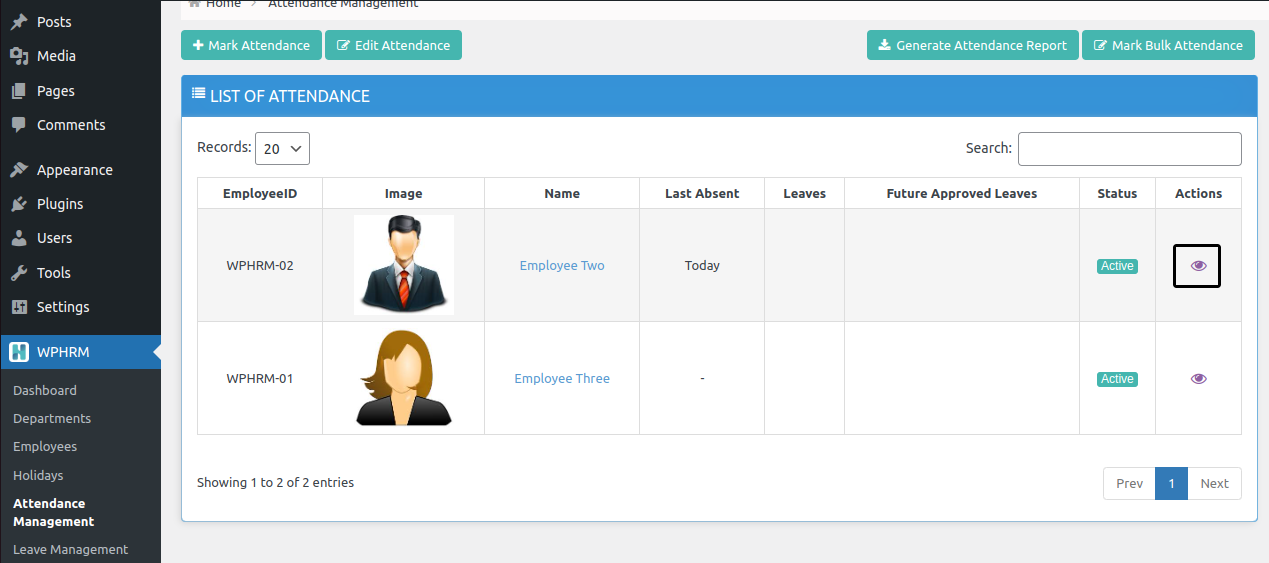
Step 6 - You can view the attendance summary in calander view of any employee using View option. Change the month and year to find previous logs, you will find a summary of total attended days and availed sick and casual leaves at the bottom left corner.
Leave Management
You can easily add and edit leaves. Please follow the below instructions.
Step 1 - Login to your WordPress Dashboard.
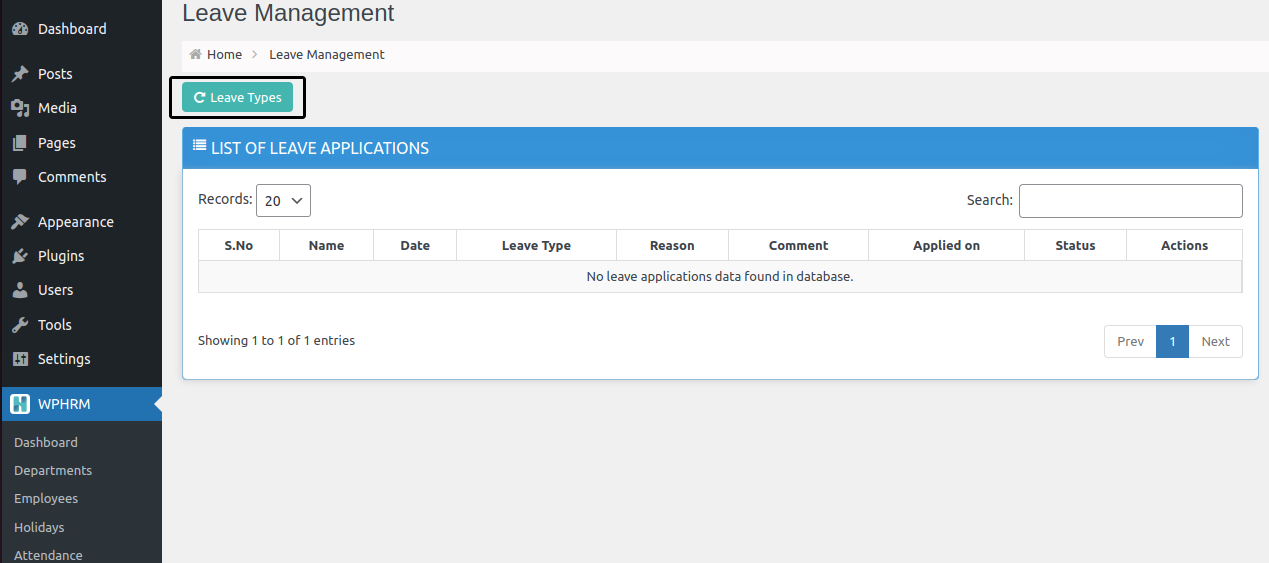
Step 2 - Go to WPHRM > Leave Management. You will be able to see the applied leaves on the dashboard. You can approve or reject the applied leave by clicking on View/Edit button. If an employee has applied for a half day leave it will be mentioned next to the date in the leave application pop up. (see the screenshot below)
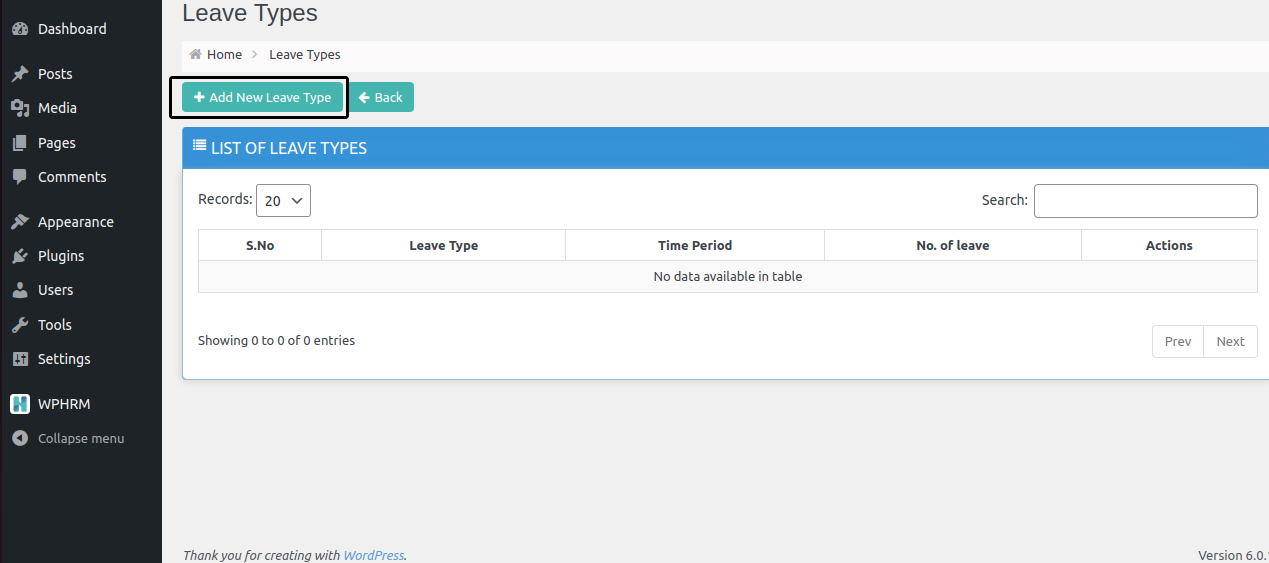
Step 3 - By default there are 6 casual leaves and 6 sick leaves added. You can view or add them by going to Leave Type. Once it’s done, just click on the Add button to save the records.
Salary Management
You can easily edit the salaries of the employess with WPHRM. Please follow the below instructions.
Step 1 - Login to your WordPress Dashboard.
Step 2 - Go to WPHRM > Salary Management and you will find the details as shown below where you’ll see list of employees and you can add his/her salary details by clicking on Salary Details . If any candidate has requested for the salary slip it will be shown here under Pending Requests. Click on it and you will be redirected to the salary slip generation page.
Step 3 - After clicking on the salary details, you will find a similar page where you can Create, Edit & Download the salary slips. Click on Create button to create a new salary slip. If you want to duplicate the salary slip of any previous month you will find a pop up appearing right after clicking on create button.
If you want to download the summary in excel sheet then pick the dates and click on Download Excel button.
Step 4 - You will find the below form on your screen, here you can add earnings and deductions of your employee. Fields such as working days, leaves and days worked will be automatically filled as per the attendance marked earlier. You can still change them as per your requirements. After adding those fields click on Generate Salary Slip button at the bottom and you will see a success message that the salary slip is generated.
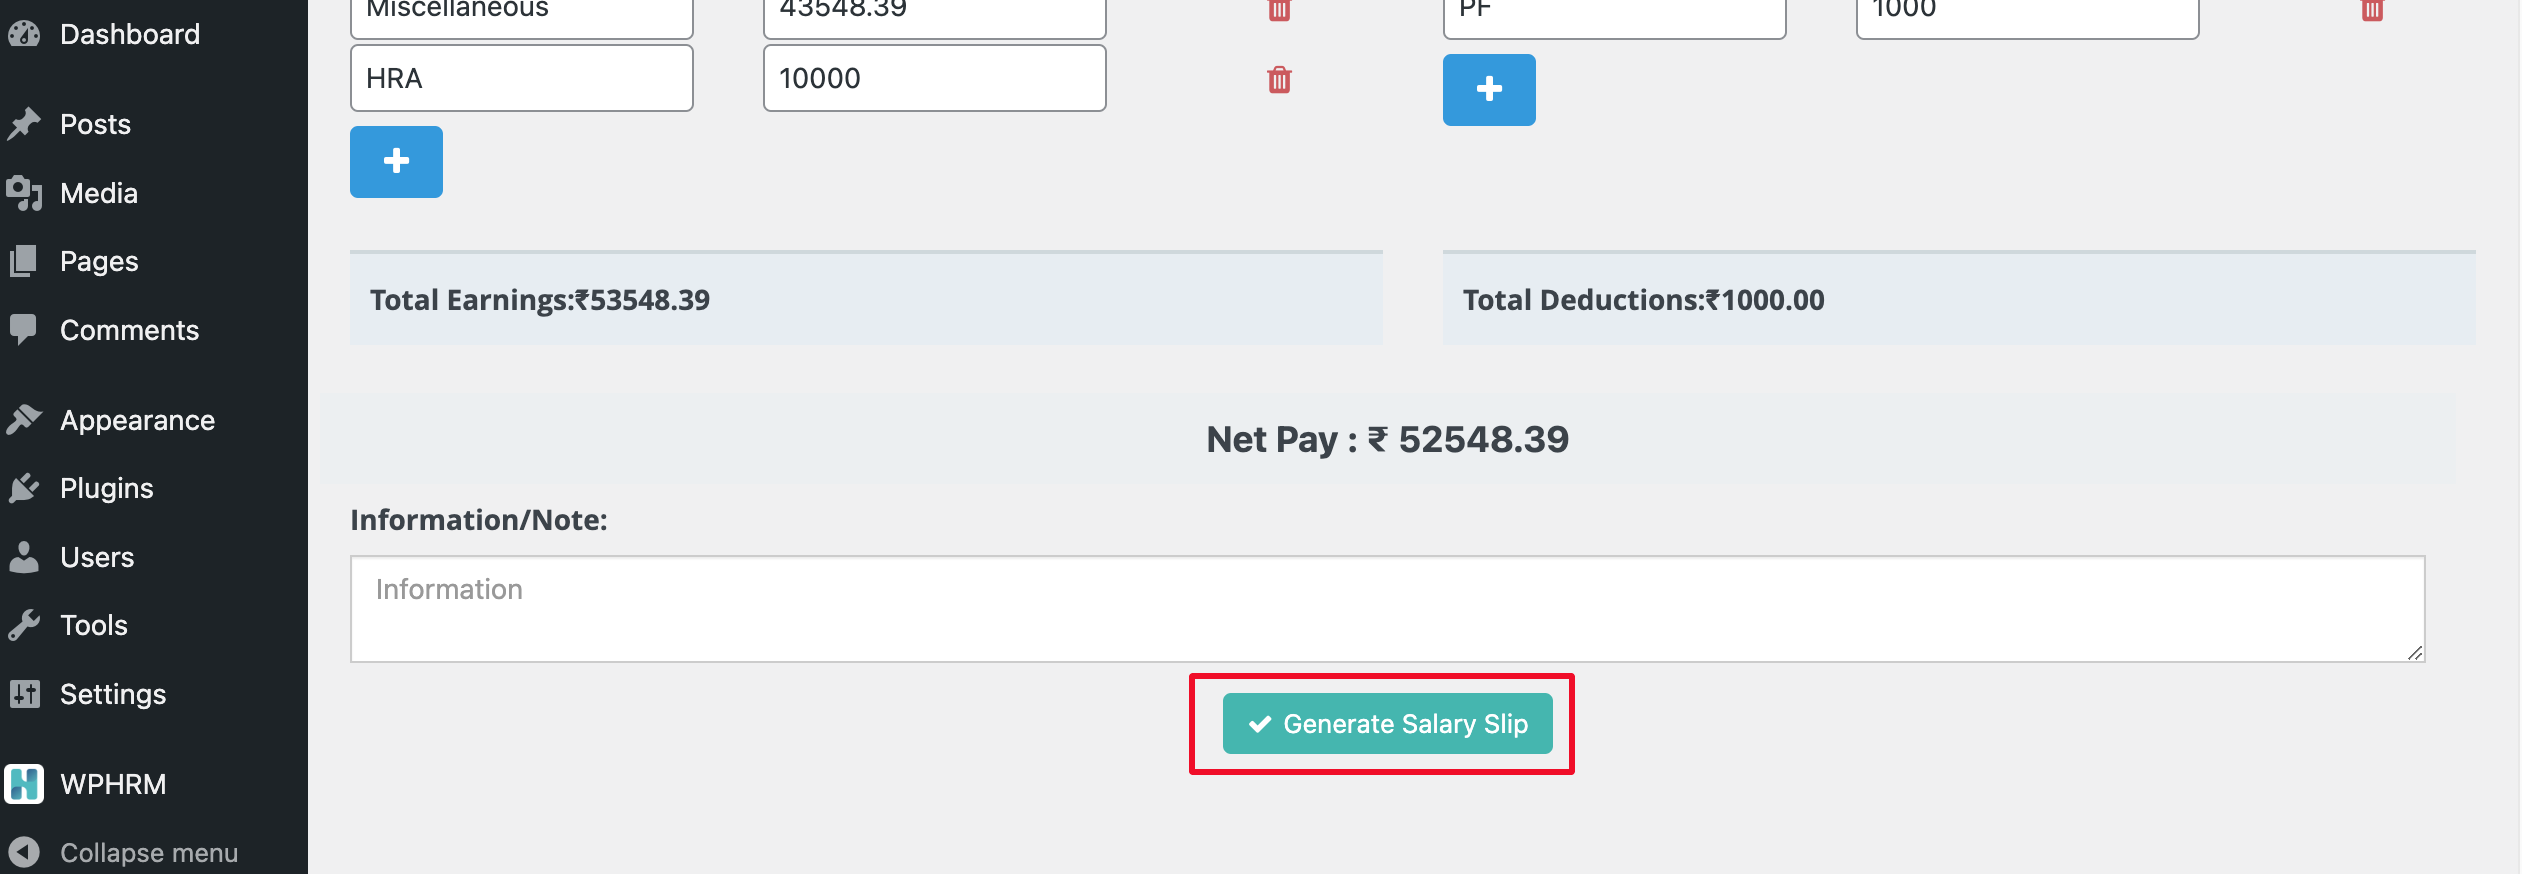
Step 5 - After generating the salary slip you will be redirected to the previous page where edit and download options will be visible.
Notices
You can easily add and edit notices with WPHRM. Please follow the below instructions.
Step 1 - Login to your WordPress Dashboard.
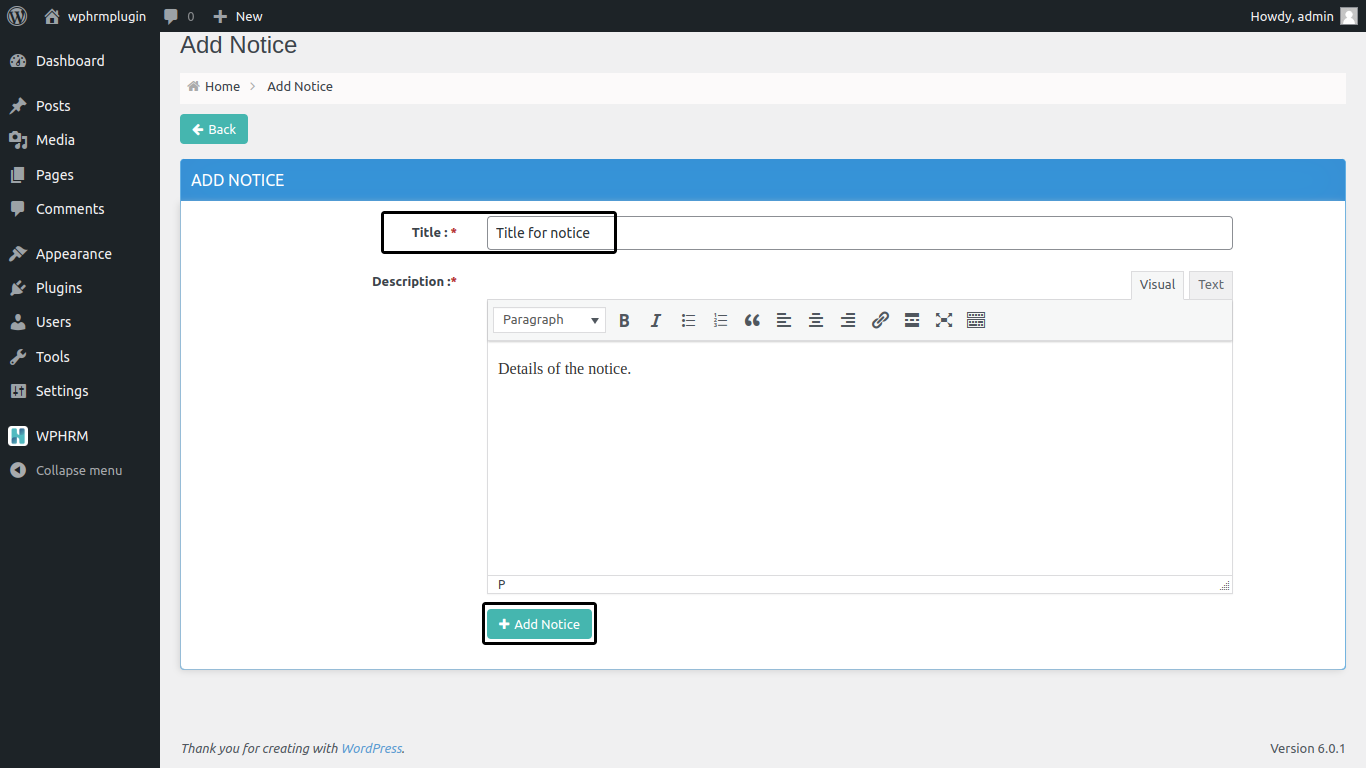
Step 2 - Go to WPHRM > Notices. The typical dashboard will be as shown below where all the notices will be listed. If you want to add a new notice then you can click on Add New Notice.
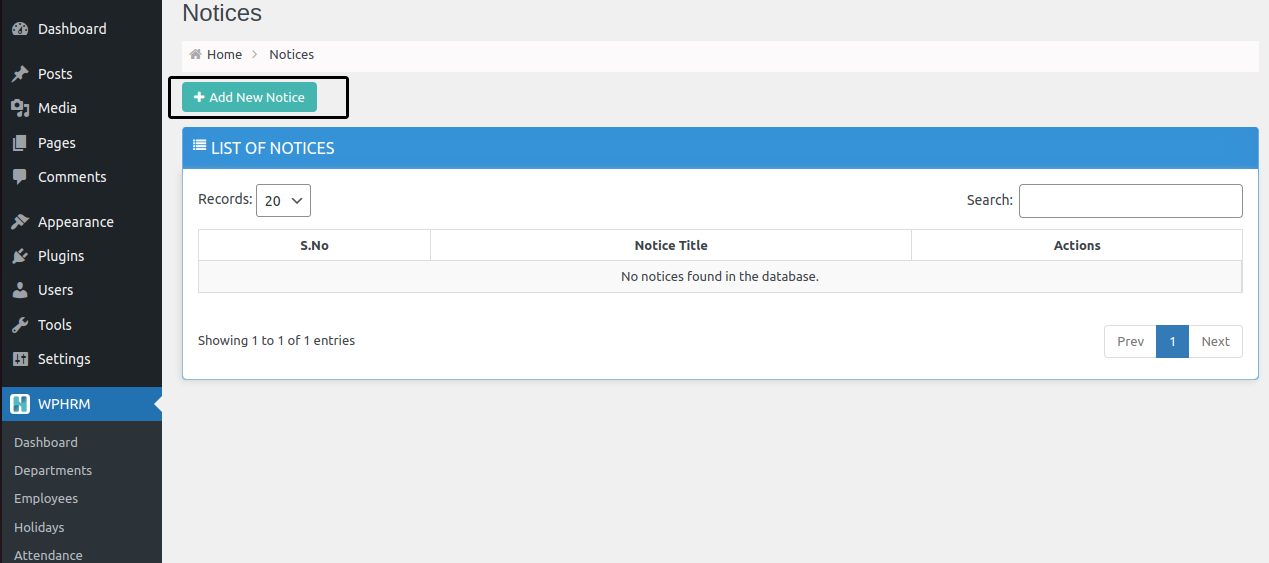
Step 3 - Enter the title and the description and click on Add Notice. Now, It will be visible on all the employees' dashboards.
Finance Management
You can easily check the total transactions that have been made by using WPHRM Plugin. Please follow the below instructions.
Step 1 - Login to your WordPress Dashboard.
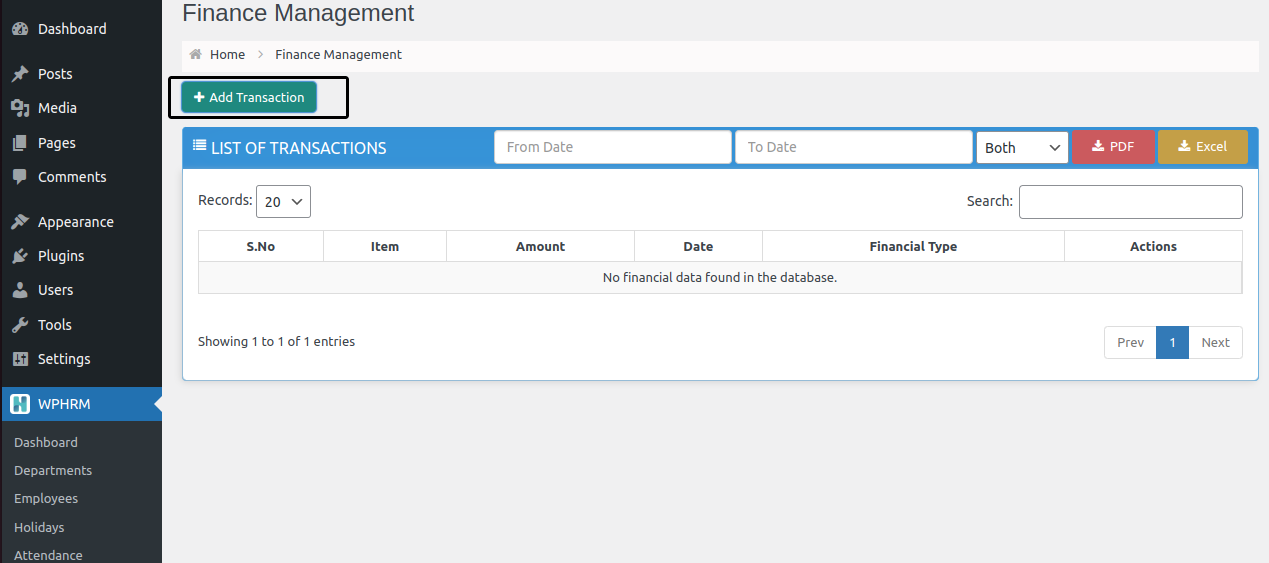
Step 2 - Go to WPHRM > Finance Management. On the dashboard, you can check the total transactions that have been made in the current month. It also provides the search option where you can search between specific dates or months. You can also search for the individual transaction made in the current month using the Search option. Downloading the list of transactions in excel or pdf format is just one click away.
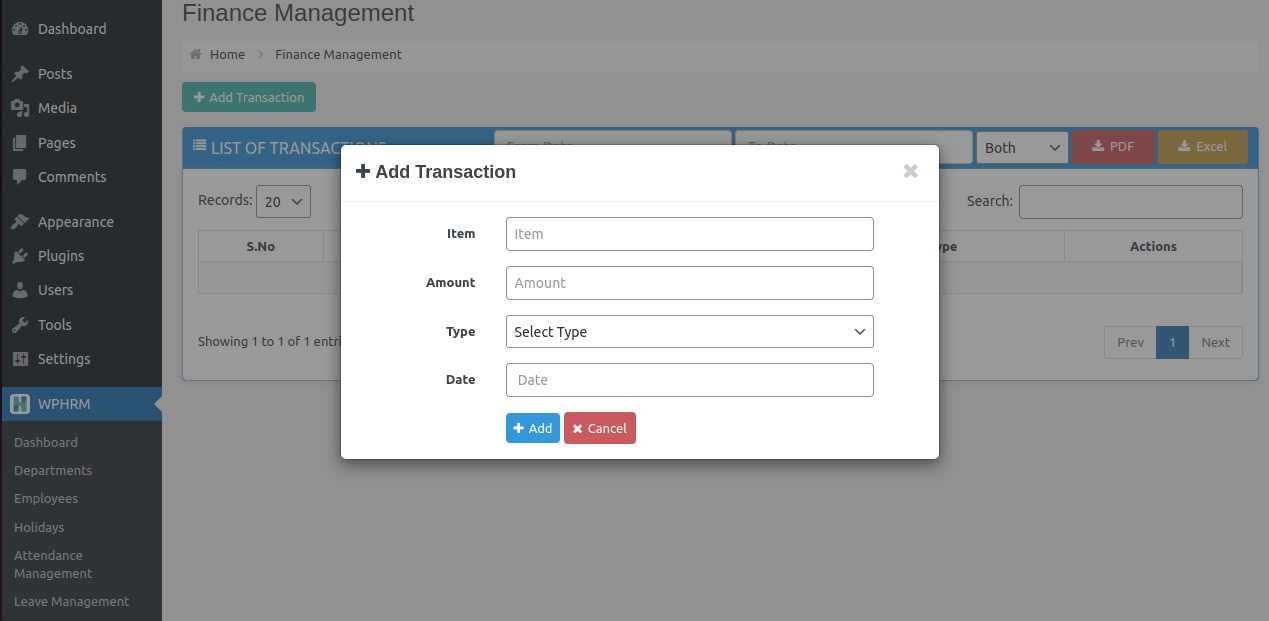
Step 3 - To a add new transaction, click on Add Transaction and you will find the below pop up where you can add the details. When done click on Add button.
Notifications
You can easily check all the notifications such as applied leaves and requests for salary slips here. Please follow the below instructions.
Step 1 - Login to your WordPress Dashboard.
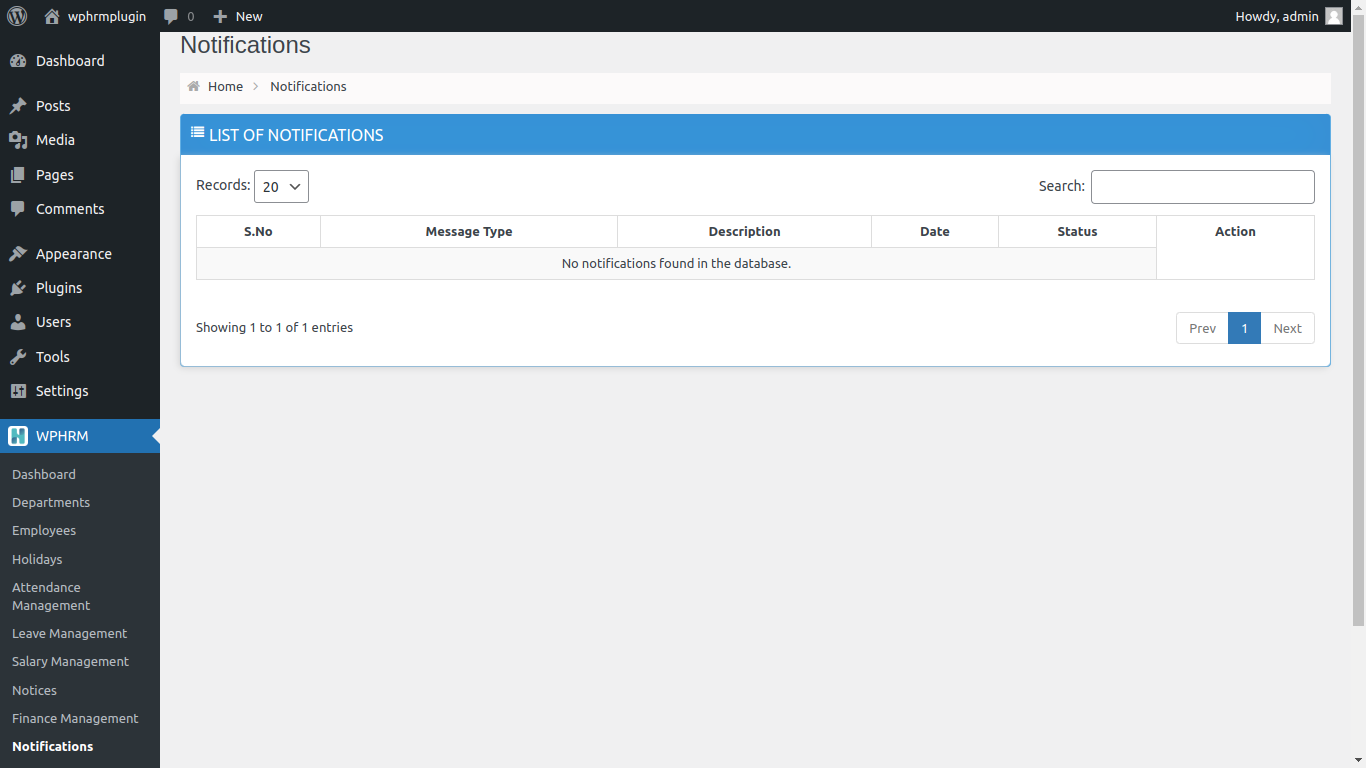
Step 2 - Go to WPHRM > Notifications. All the notifications such as applied leaves and request for the salary slips will be shown here.
Settings
There are various number of fields which can be added or edited using the settings option.
Step 1 - Login to your WordPress Dashboard.
Step 2 - Go to WPHRM > Settings.
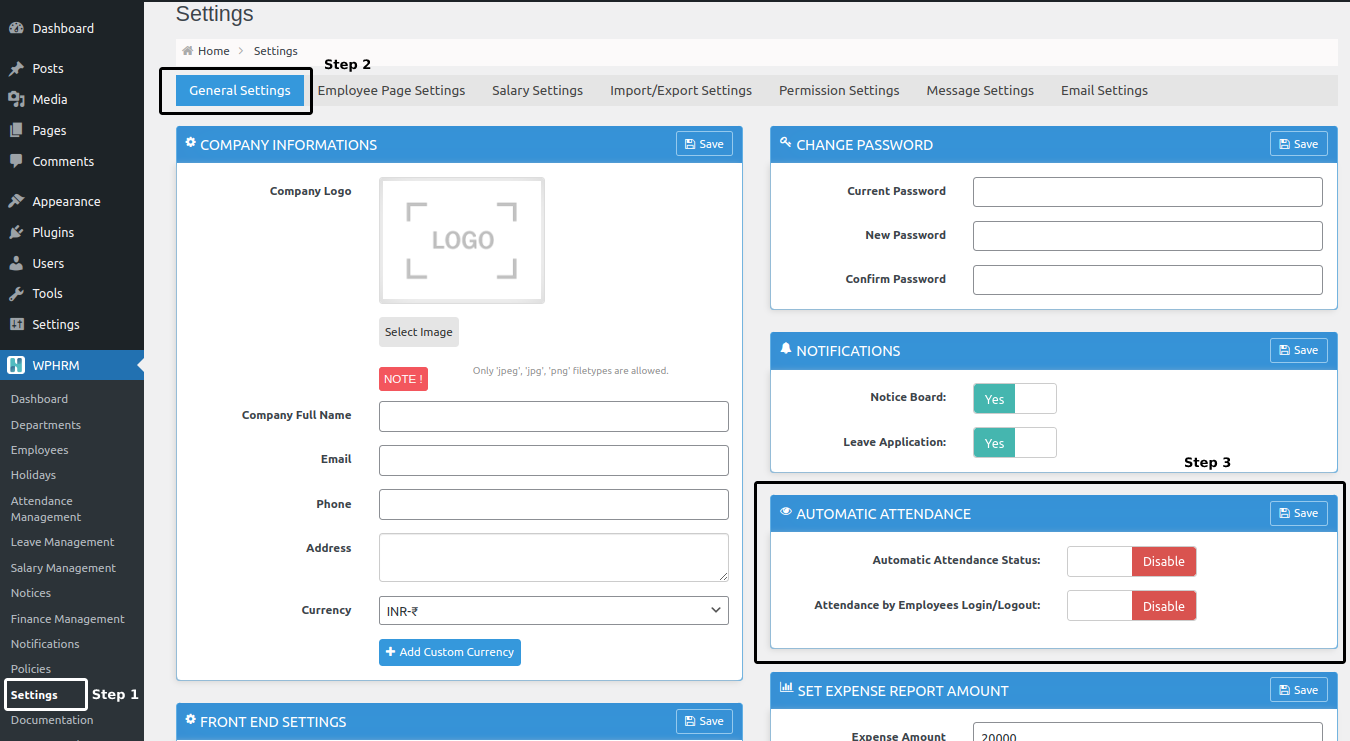
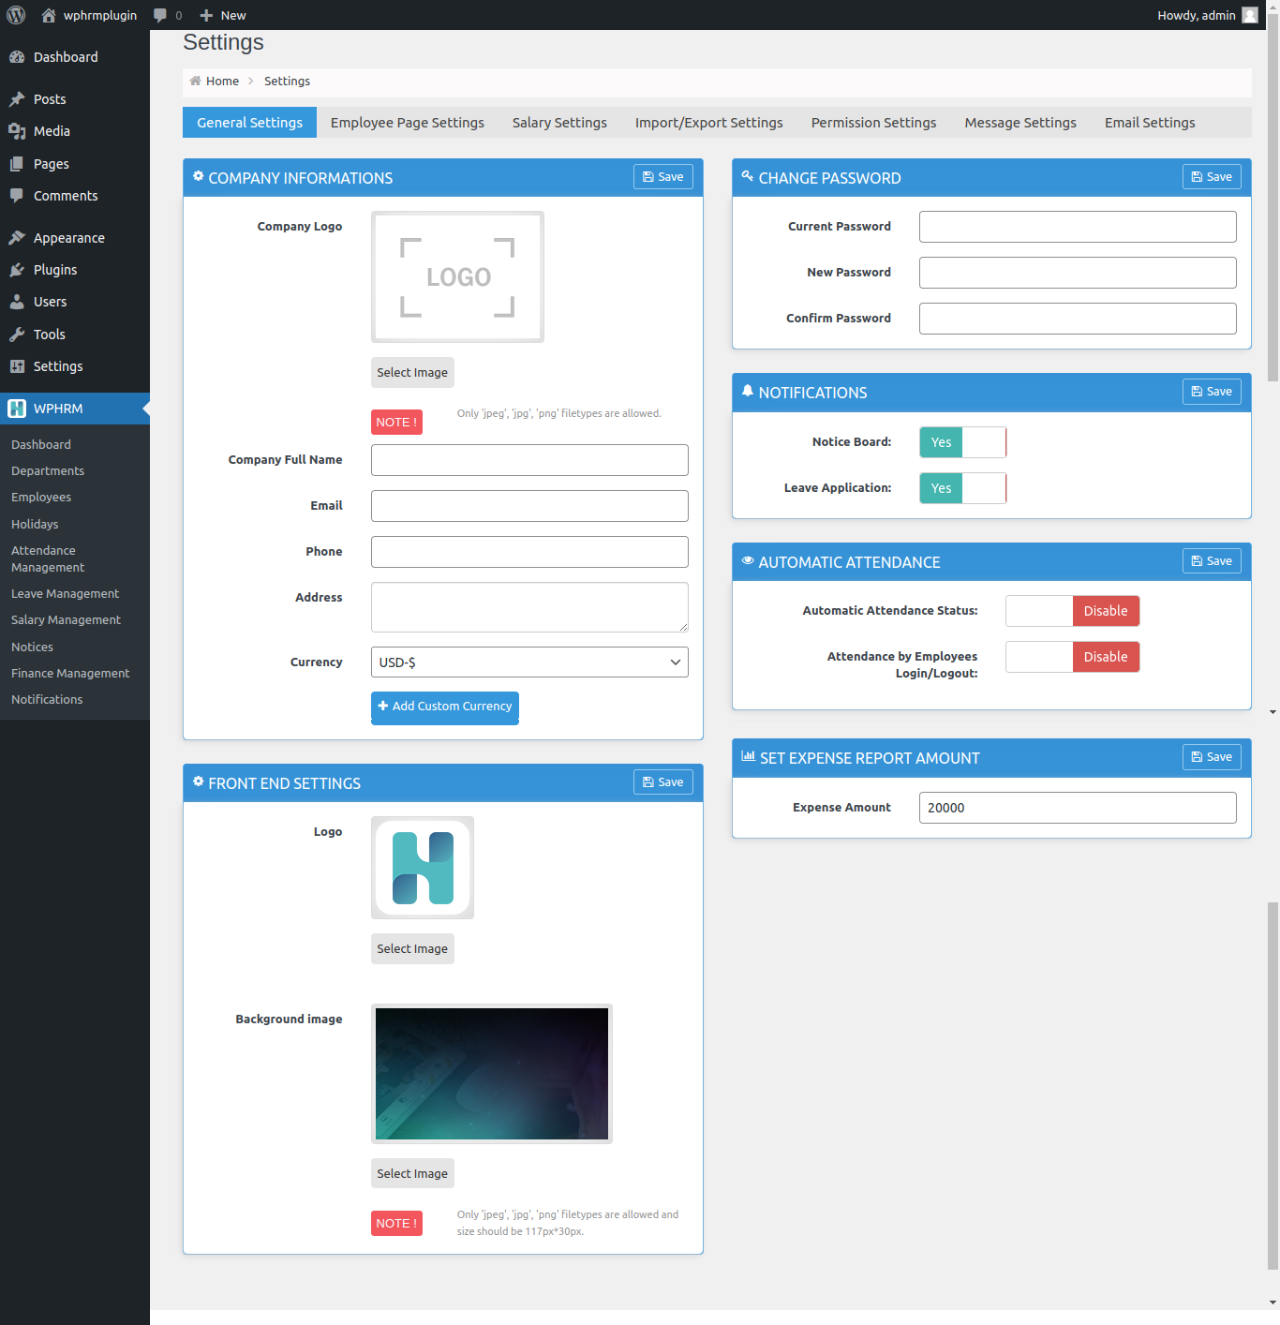
General Settings
– Company Informations: You can upload your company’s logo, add address, phone number, e-mail id etc. You can also assign a custom currency as per your country.
Note: These all details will be visible on the salary slips that will be generated.
– Change Password: Change your current password using this option.
– Notifications: You can Enable or Disable, notice board and leave application notifications from here.
– Automatic Attendance: Keep the toggle switch "Enable" if you want attendance to be marked automatically. On keeping it "Disable" you need to mark the attendance on daily basis.
– Set Expense Report Amount: You can set a minimum value for the profit and loss graph here. It will be displayed on dashboard and it indicates the profit and loss of the year on monthly basis. By default, the maximum value will be ten times of the expense amount which will be set here.
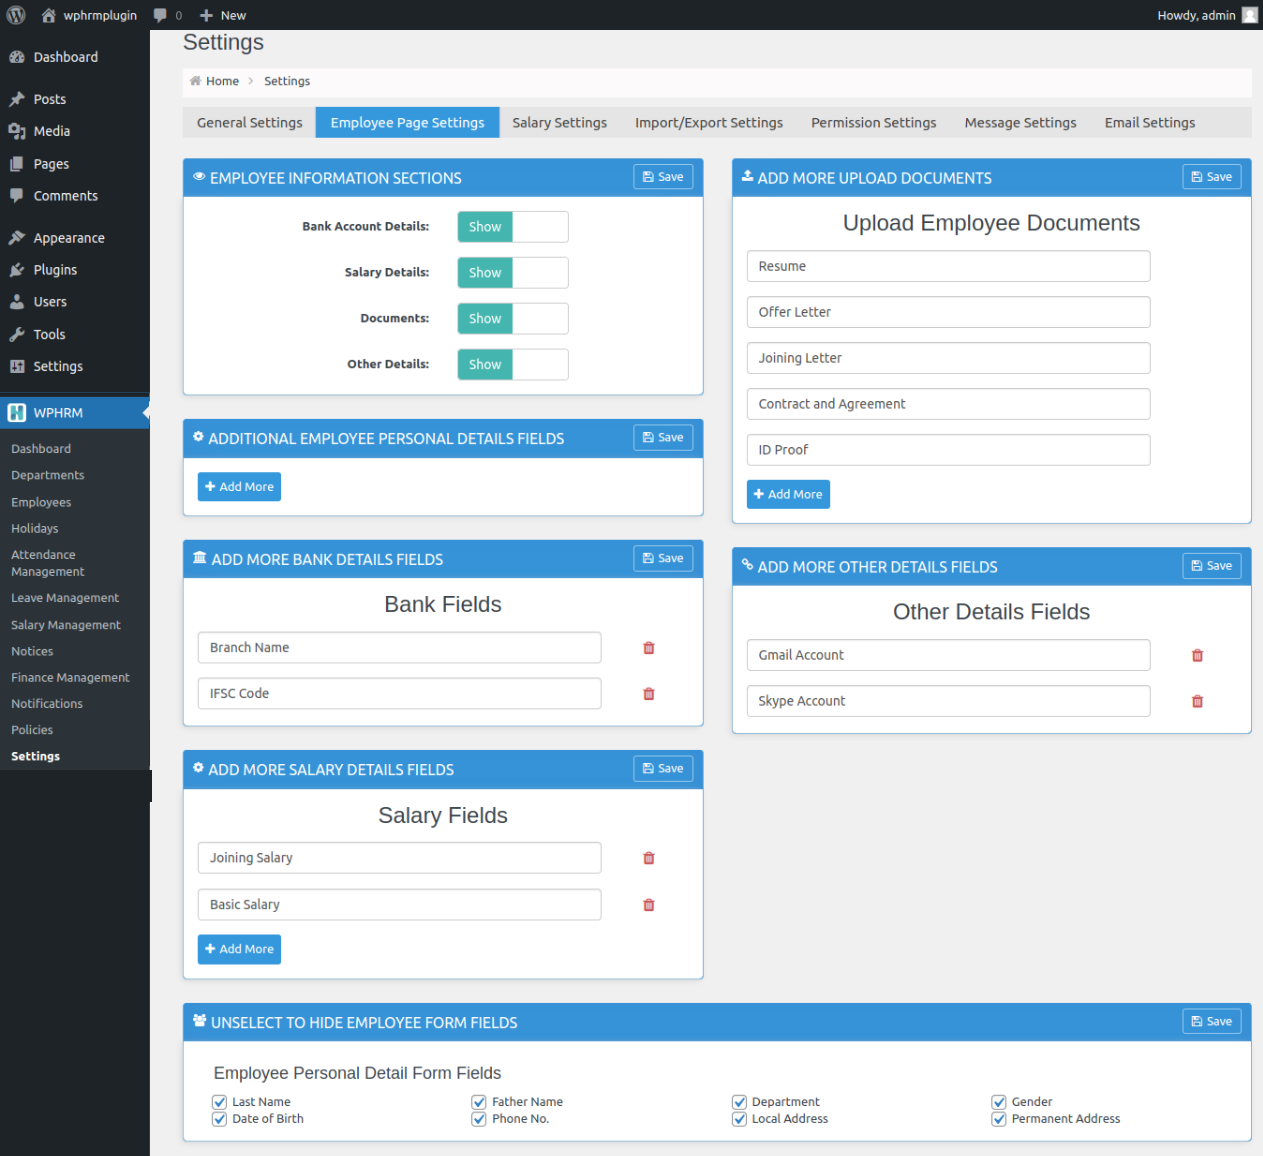
Employee Page Settings
– Information Section: Hide or Show sections on employee page as per your requirement.
– Bank Details Field: Add end number of bank details fields.
– Salary Details Field: Add end number of salary details fields.
– Upload Documents: You can add custom fields to attach various documents with employee profile.
– Other Details Field: You can add as many fields as you require.
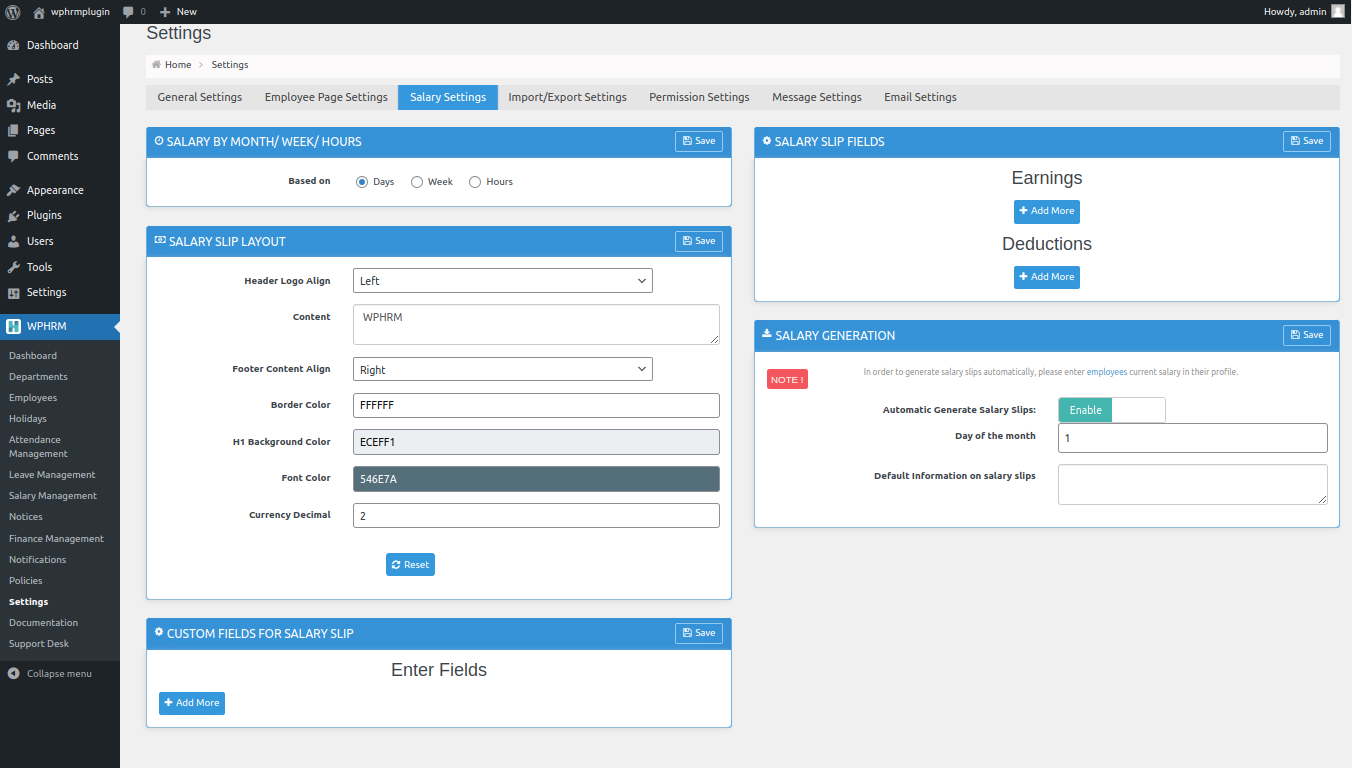
Salary Settings
– Salary By Month/ Week/ Hours: As per your selected method here, salary will be calculated. For Month and Week, salary details will be fetched on the basis of attandance marked by admin. Incase of hourly basis, admin needs to manually create the salary slips from Salary Management.
– Salary Slip Layout: You can set the position of the logo to left, right or center of the slip. Using content, you can add more details in the footer of the salary slip and that can be aligned too. Using color picker tool you can set border, headings & font color very easily. Now, you can add or remove the decimals as per your need. By default it’ll be set to show 2 decimal values. If you do not wish to keep it, set the decimal value to zero and click on the save button.
– Custom Fields for Salary Slips:: If you want custom fields printed on every salary slips add them here. Such as company registration number, etc.
– Salary Slip Fields: You can easily add more fields in the earnings and deductions section which will be displayed in the salary slip.
– Salary Generation: You can enable/disable automaticed salary slips generator. If it’s enabled choose a date on which you want salary slips to be generated automatically. You can add default message, which will be printed on every salary slips.
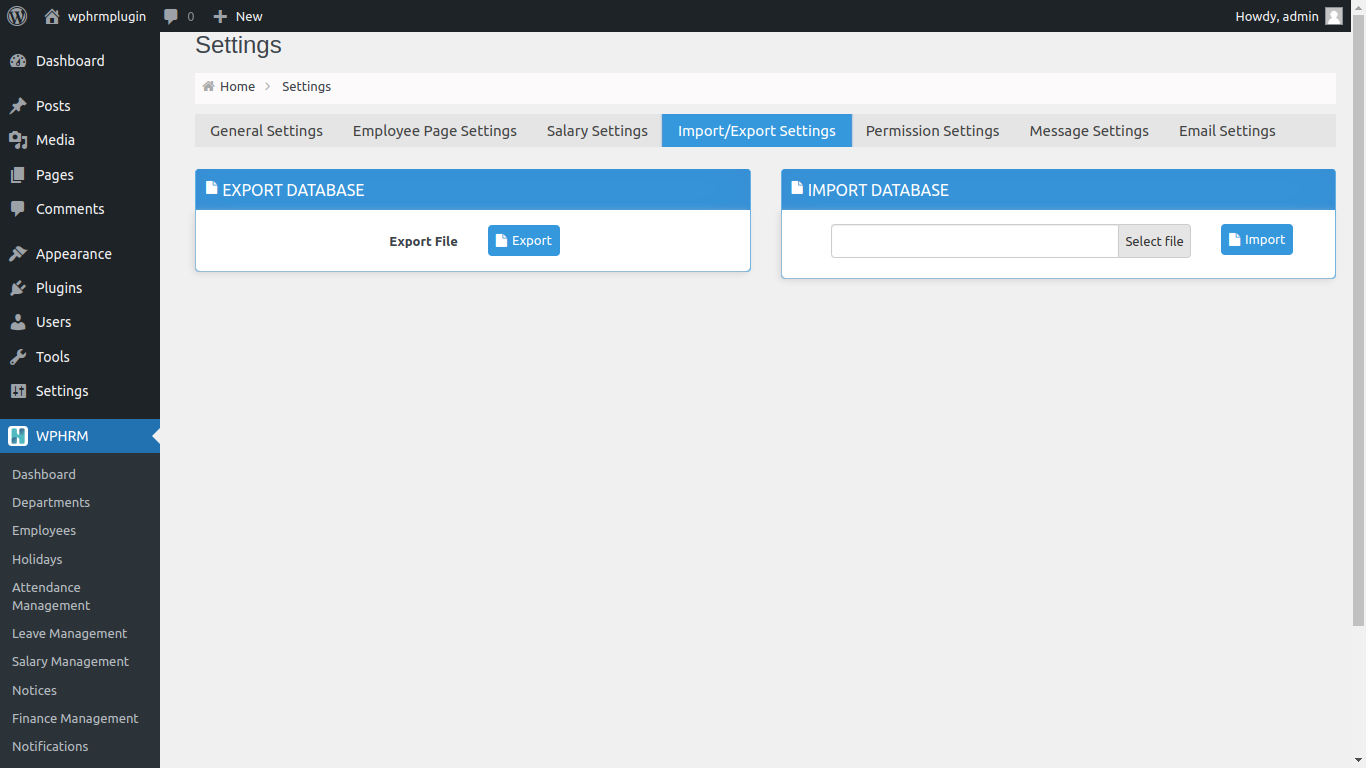
Import/Export Settings
– Export: Export your database with single click and it’s ready to imported by WPHRM on another website.
– Import: Import database with single click. Refer FAQ for better explanation.
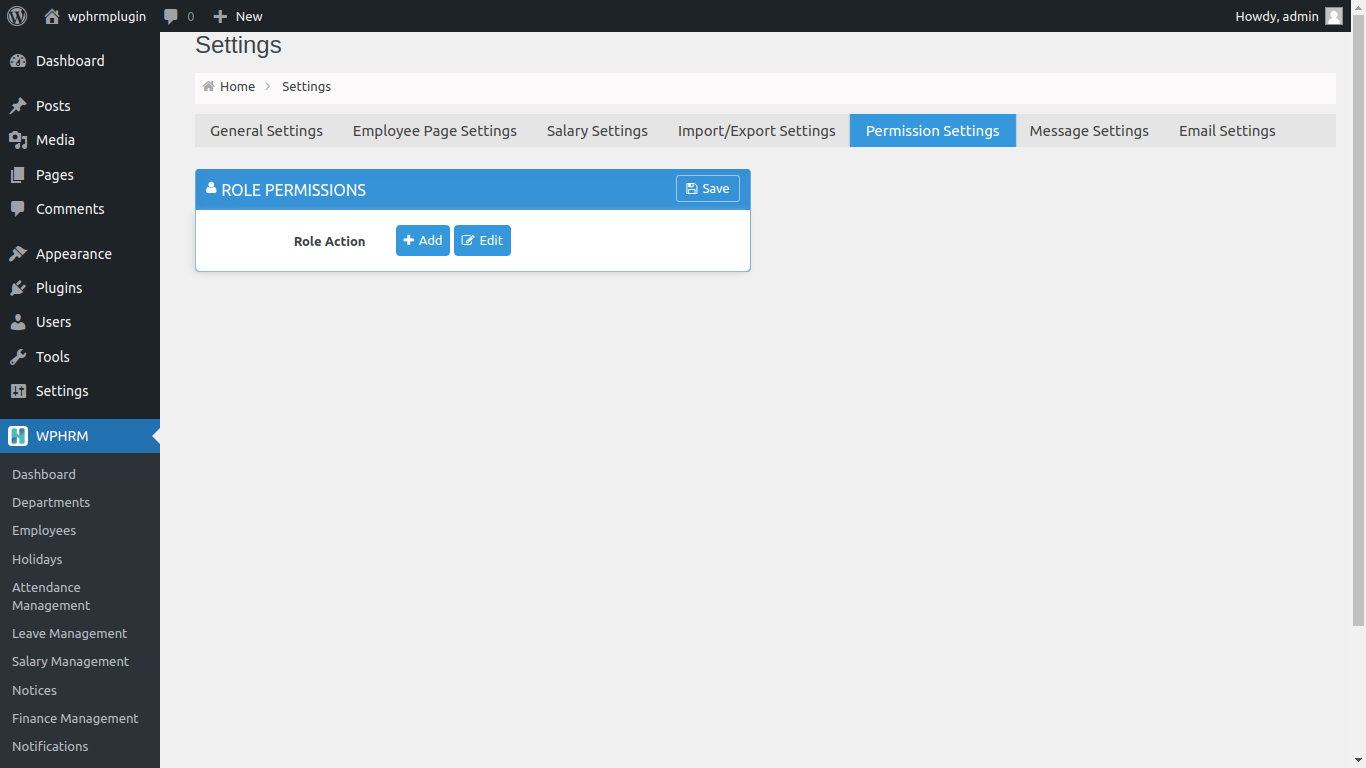
Permissions Settings
– Role Permissions: You can create a new role from here and assign permissions to it. Later on go to Employees and change the employee role to this new assigned permissions. Now, he/she will have rights to access those departments and have the full authority for those specific assigned departments.
– You can edit already created role using edit option.
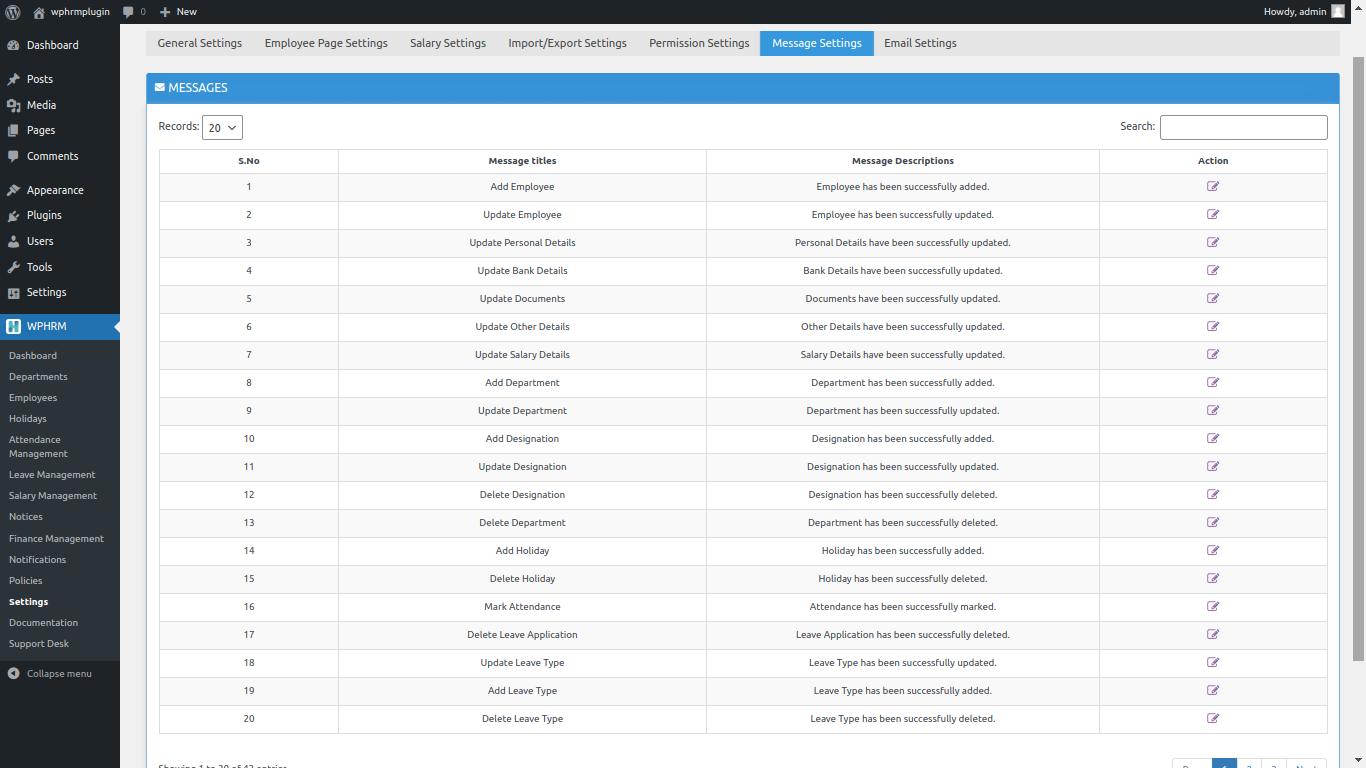
Messages Settings: All the success messages that appears will be editable here. You can click on view/edit/rename the text as per your requirements.
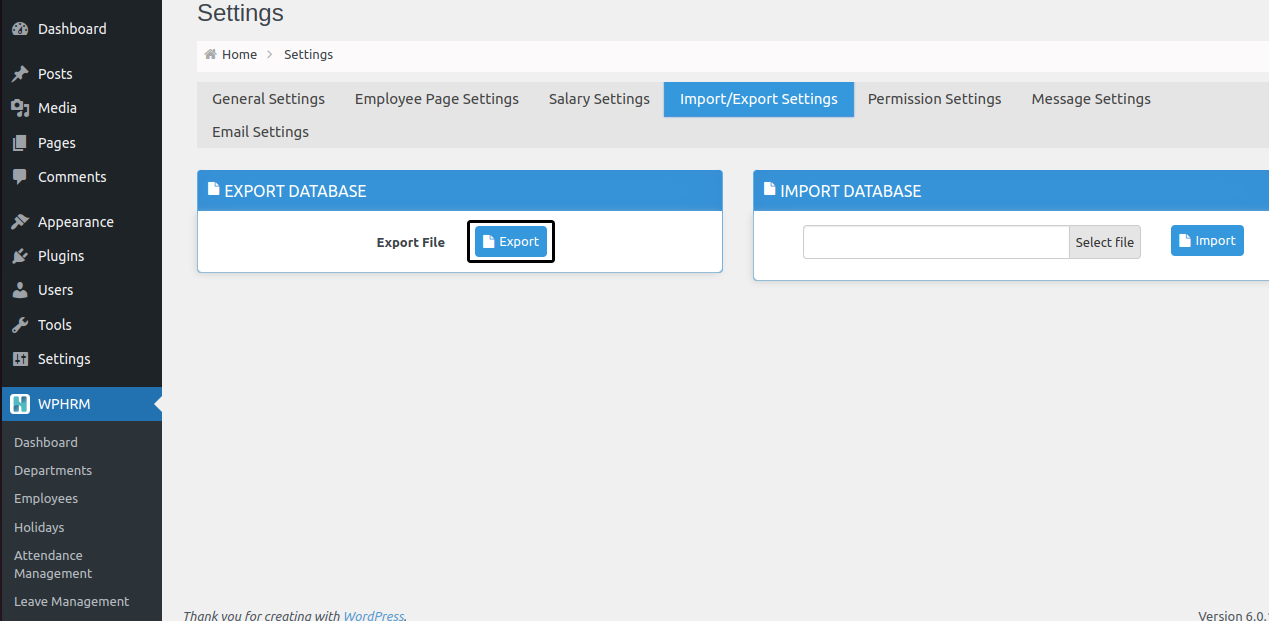
Export your database
Export your database. You can easily export your database from one WPHRM to another in just one click.
Step 1 - Go to Settings > Export Database and click on Export. You’ll see a file getting downloaded with the name wphrm_database_file.xml.
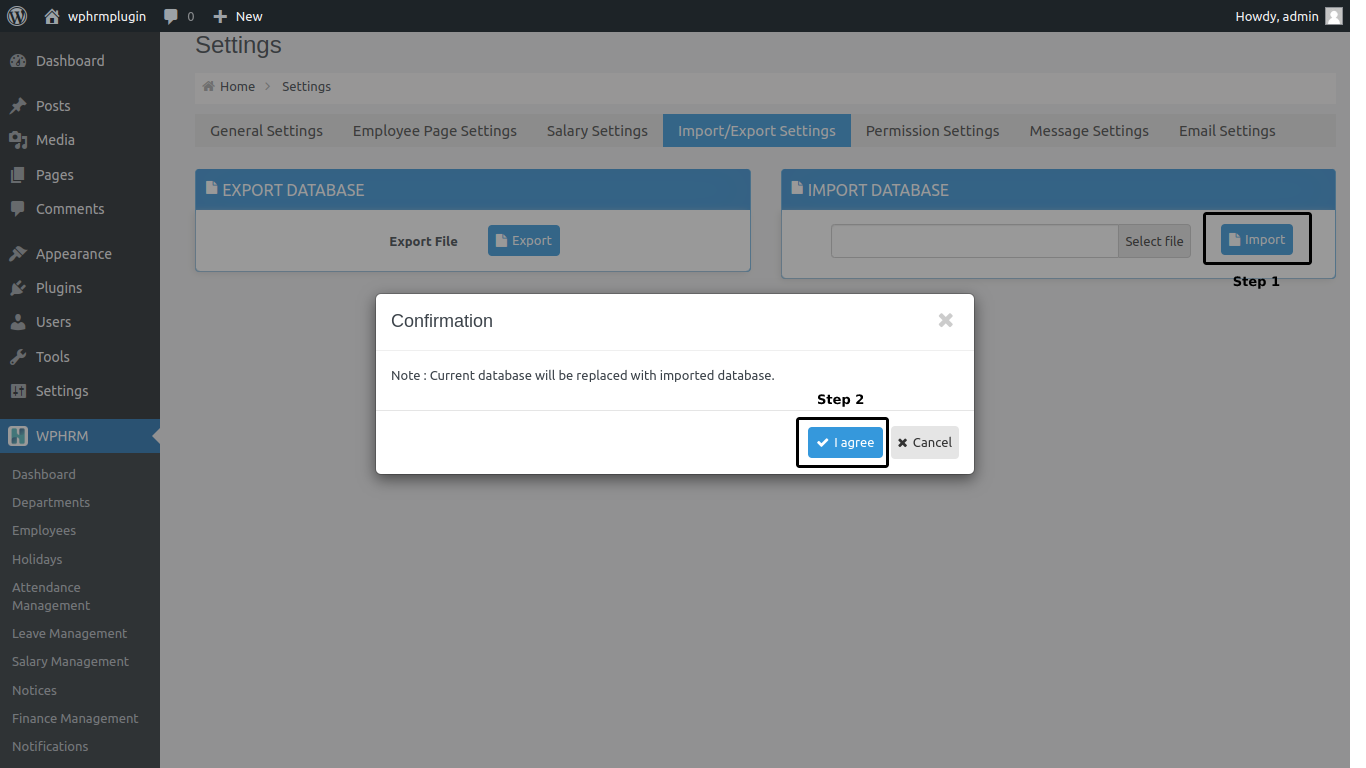
Import your database
Import your database. You can easily Import other WPHRM database into yours. Please note all of your existing database will be replaced with the new one.
Step 1 - Go to Settings > Import Database and first select database file, when done click on Import button. You’ll get a warning message, click on I agree and the database will be loaded..
Add WP Users
How can I add my WordPress users to WPHRM? Follow the below steps to add your existing WordPress user into WPHRM.
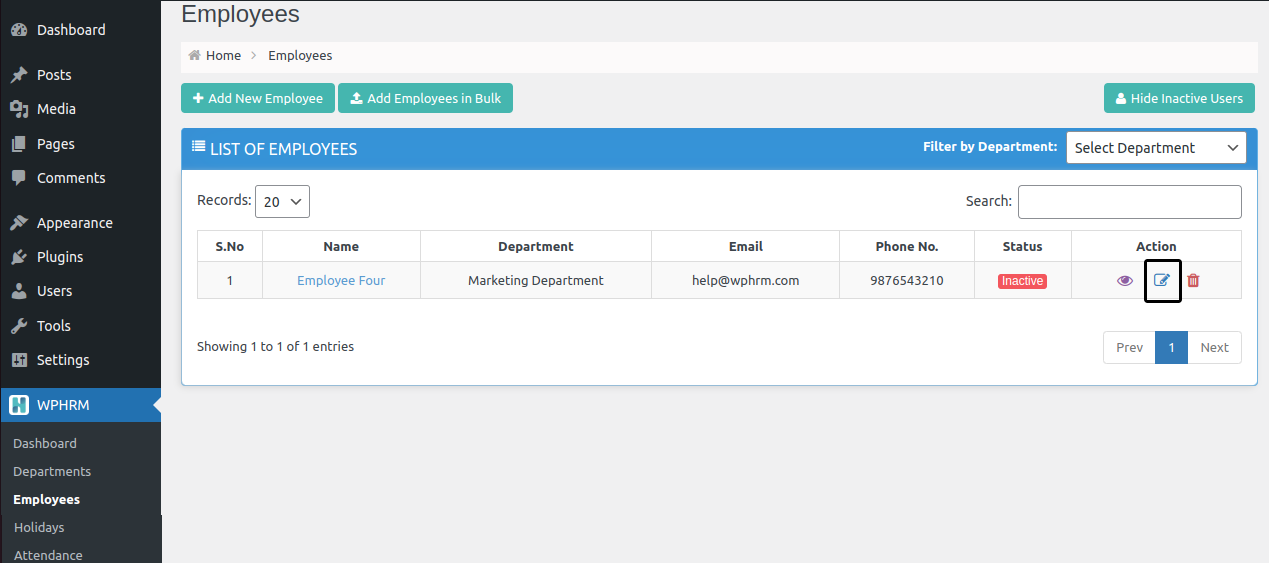
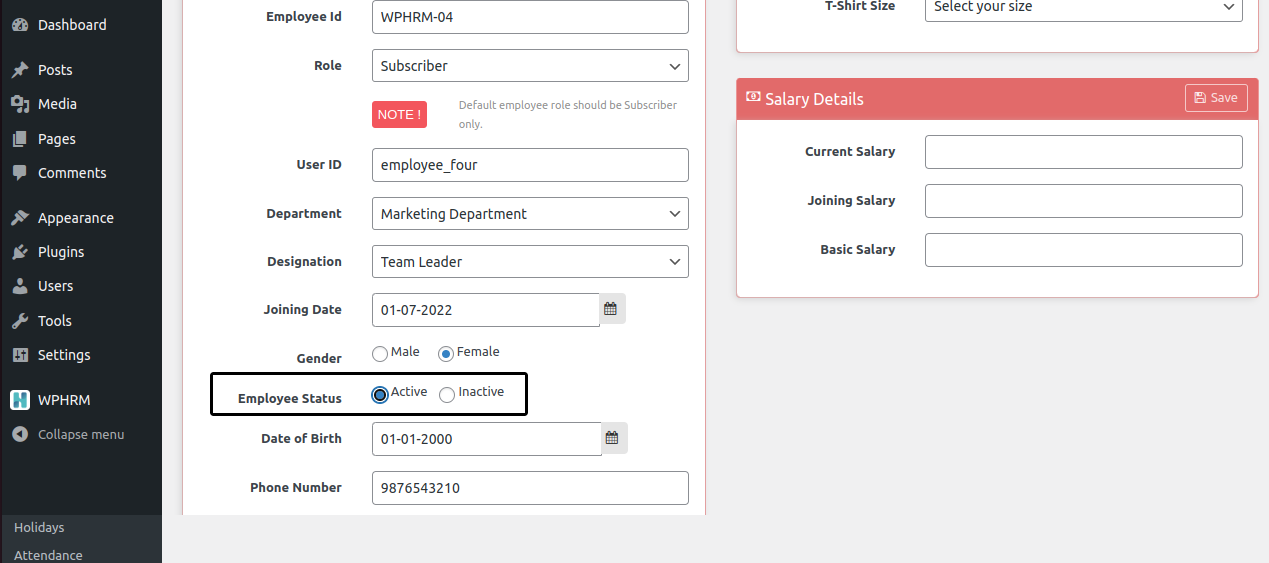
Step 1 - Go to Employees and click on Show All WP Users and you’ll see the WordPress users with Inactive status. Click on Edit and change there status to Active, fill the required informations and click on Save button and user will be added in WPHRM.

Generate Salary Report
How can I Generate Monthly or Annualy salary report? Follow the below steps to add your existing WordPress user into WPHRM.
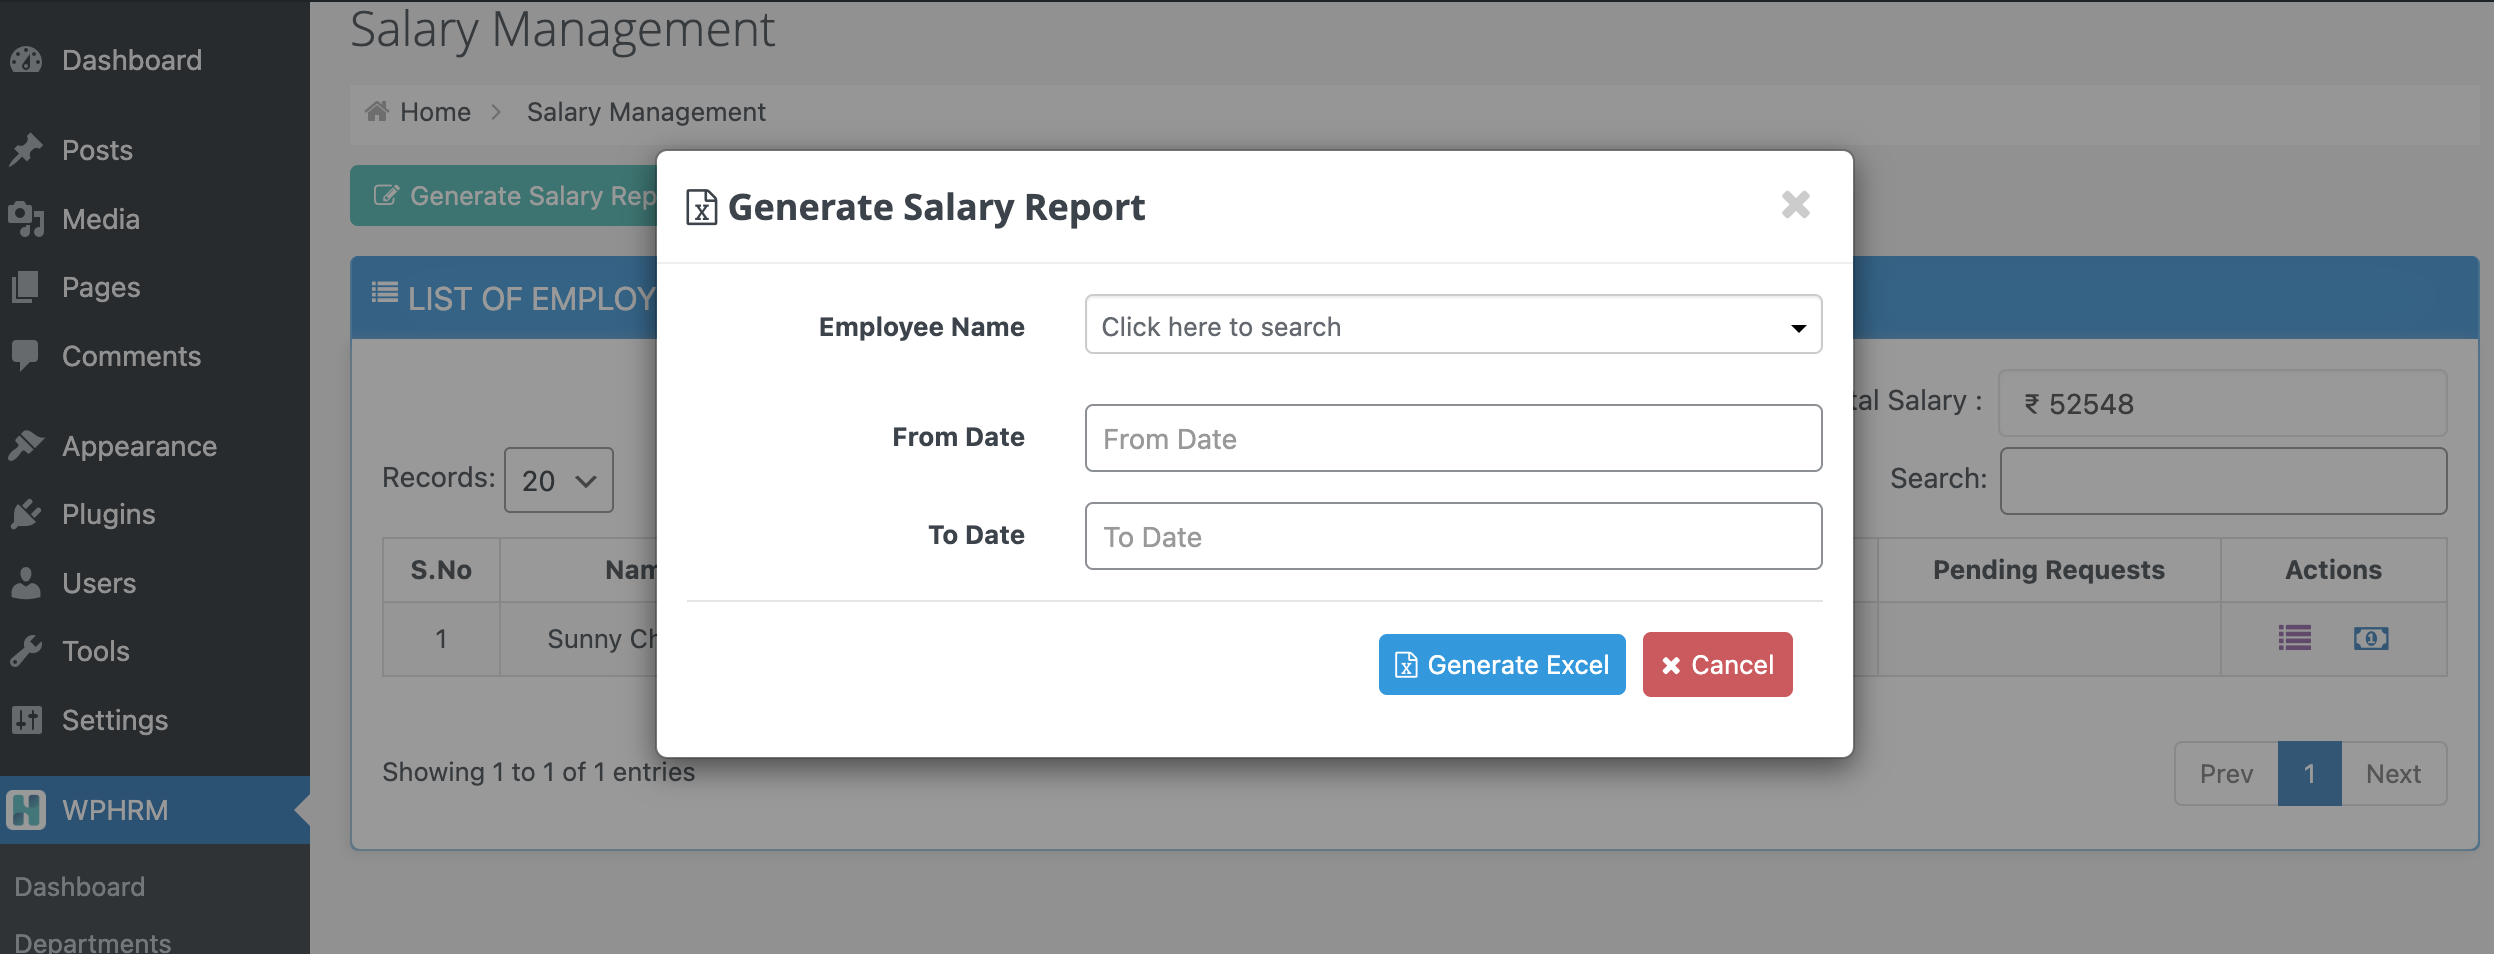
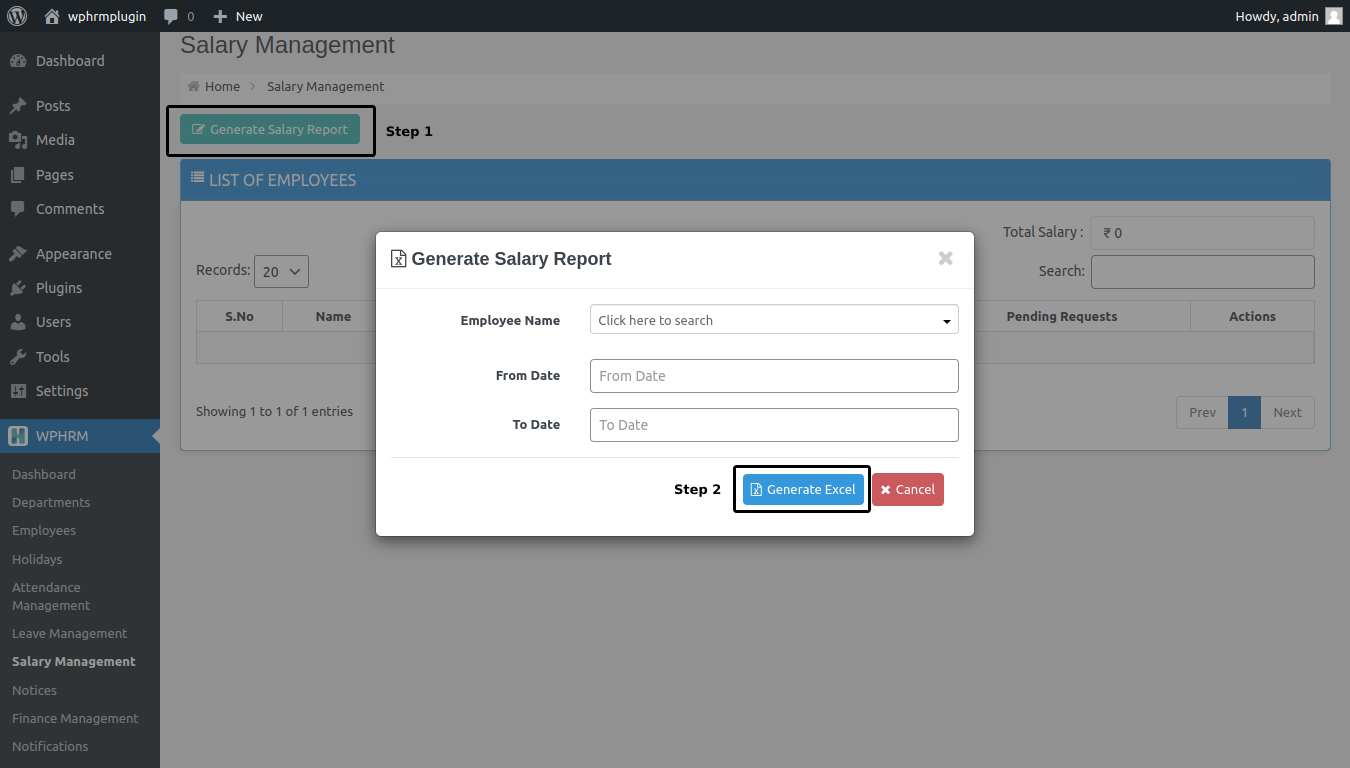
Step 1 - Go to Salary Management and click on Generate Salary Report and a popup will appear. Select employees, relevant dates and click on Generate Excel button.
Enable Attendance by Employee Login/Logout
How can I Enable Attendance by Employee Login/Logout ?
- If you want to enable attendance by Employee Login/Logout then you need to go to WPHRM settings area and enable it as shown below: